There are a lot of options when it comes to building serverless systems. In this series, we’ll build the same service with different frameworks and tools. We’ll highlight architecture decisions and discuss alternatives and their trade-offs along the way. You’ll learn about the many different ways services can be built with AWS. Cloud engineering is all about understanding requirements and making choices based on tradeoffs.
What We’re Building
The example service we’re building is a file upload service. It will have one POST endpoint to upload a file, a GET endpoint to query for a list of files uploaded in a date range, and a database to store the metadata. Instead of reaching for a web framework like Express or Fastify, we’ll use AWS services and different IaC frameworks to orchestrate the infrastructure and deploy the code.
First up, we’ll use SAM (Serverless Application Model) to define our AWS resources in a configuration file and use that file to deploy our service. The most annoying part of starting an AWS project is configuring account access and users. You will need an AWS account, and create an admin user with IAM Identity Center. IAM Identity Center is a service that creates an identity domain separate from IAM roles and policies. With IAM Identity Center, we’ll have an SSO login with automation to refresh credentials. This way, we won’t have to manage long-lived IAM users with secret keys. To make things even easier, I recommend following along in a GitHub Codespace that I have preconfigured with Nodejs, AWS CLI, SAM CLI, and AWS Toolkit. GitHub Codespaces is a cloud environment you can use for development with VS Code in a browser, no need to install anything locally on your machine. This means you can work on any device, as long as it has an internet connection and a browser.
Starting With SAM
Here’s a link to the repo: https://github.com/pchinjr/serverless-file-upload
Fork it and launch the Codespace from the web ui:

When the Codespace launches, it uses devcontainer.json to build an environment from container images. This will install the AWS CLI, SAM CLI, CloudFormation linter extension, and AWS toolkit extension.
When the environment launches, you’ll have a full VS Code IDE in your browser and you can use the terminal to log into your AWS account with the command aws sso login.
SAM reduces the complexity of CloudFormation templates by providing a streamlined syntax and managing many of the underlying resources and configurations automatically, making it easier to develop, deploy, and manage serverless applications on AWS.
Let’s build up the service one piece at a time, so you can see how the SAM template interacts with your source code. It starts with template.yaml a configuration manifest that declares the resources you want to provision in AWS.
This template.yaml declares three resources:
- an S3 bucket to hold the file
- an API Gateway to create HTTP endpoints
- a Lambda function to process the file upload
Here is the function code to handle the file upload.
In this function, we’re instantiating an S3 Client from the AWS-SDK, reading the event.body, and issuing a PutObjectCommand to put the file into our preconfigured S3 Bucket.
We can now use the SAM CLI to build, validate, and deploy our code along with its infrastructure.
In the same directory as the template.yaml file:
- use the command
$ sam buildto build the deployment artifact. - use the command
$ sam validateto test the yaml file. - Finally, use the command
$ sam deploy --guidedto begin deploying. With the--guidedflag, use the terminal to answer the prompts:
Checking Our First Deployment
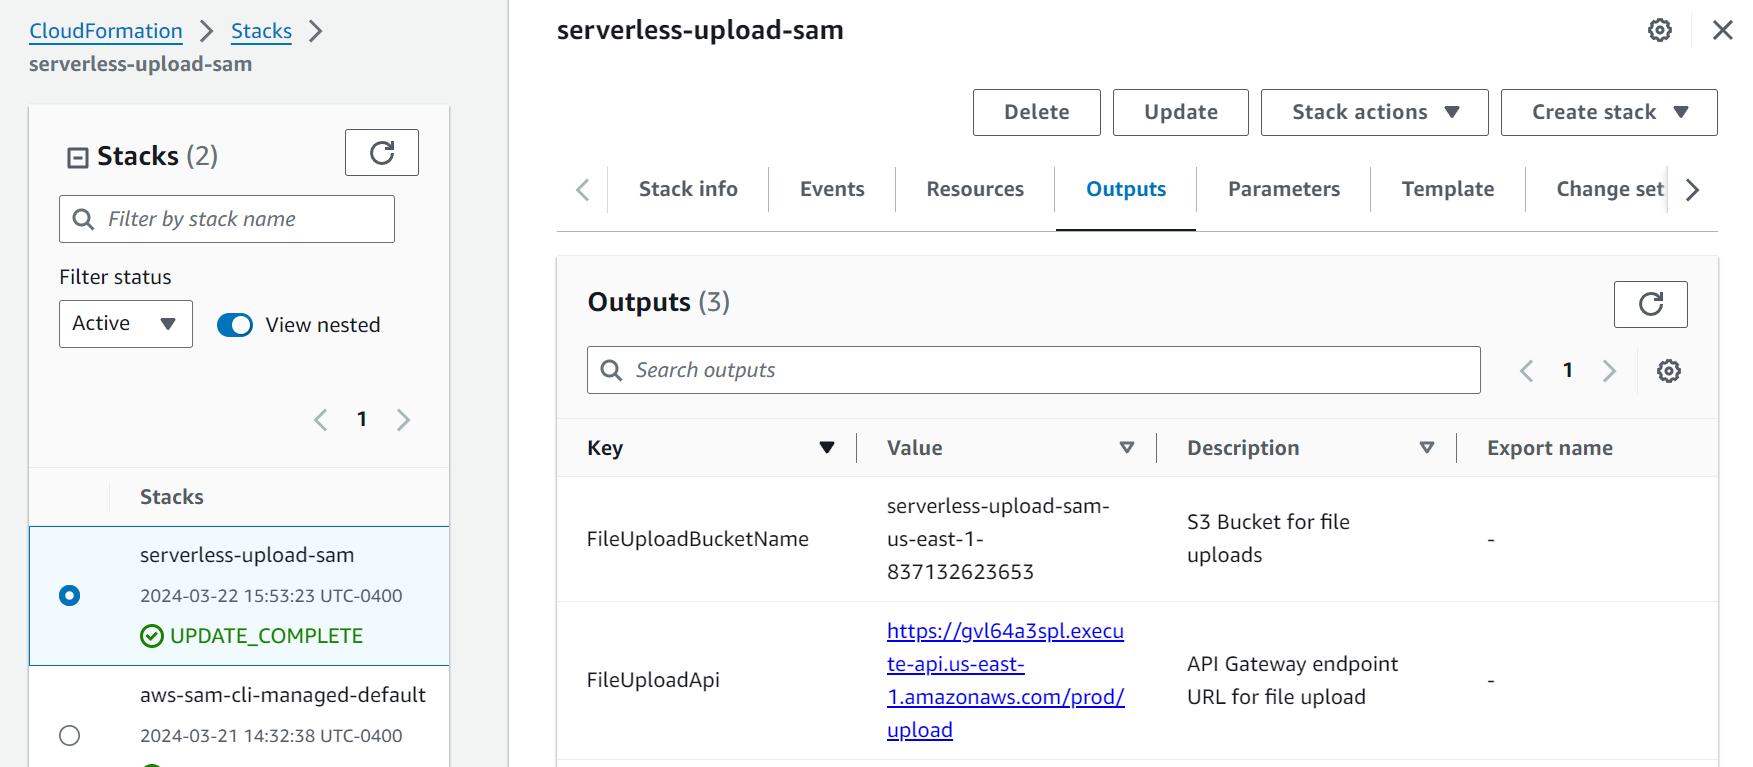
Now we can go to the AWS console and look at our CloudFormation stack deployment

Take note of the FileUploadApi value, which is the address of our API Gateway endpoint. We can trigger the Lambda function by posting a Base64 encoded file in the event body. I made a text file with the contents: Praise Cage! Hallowed by thy name. We can encode the file to Base64 from the command line $ base64 text.txt > text.txt.base64, using my example we get an output of UHJhaXNlIENhZ2UhIEhhbGxvd2VkIGJ5IHRoeSBuYW1lLg== which we use to build a curl command to test our endpoint. Be sure to replace the endpoint address with your values.
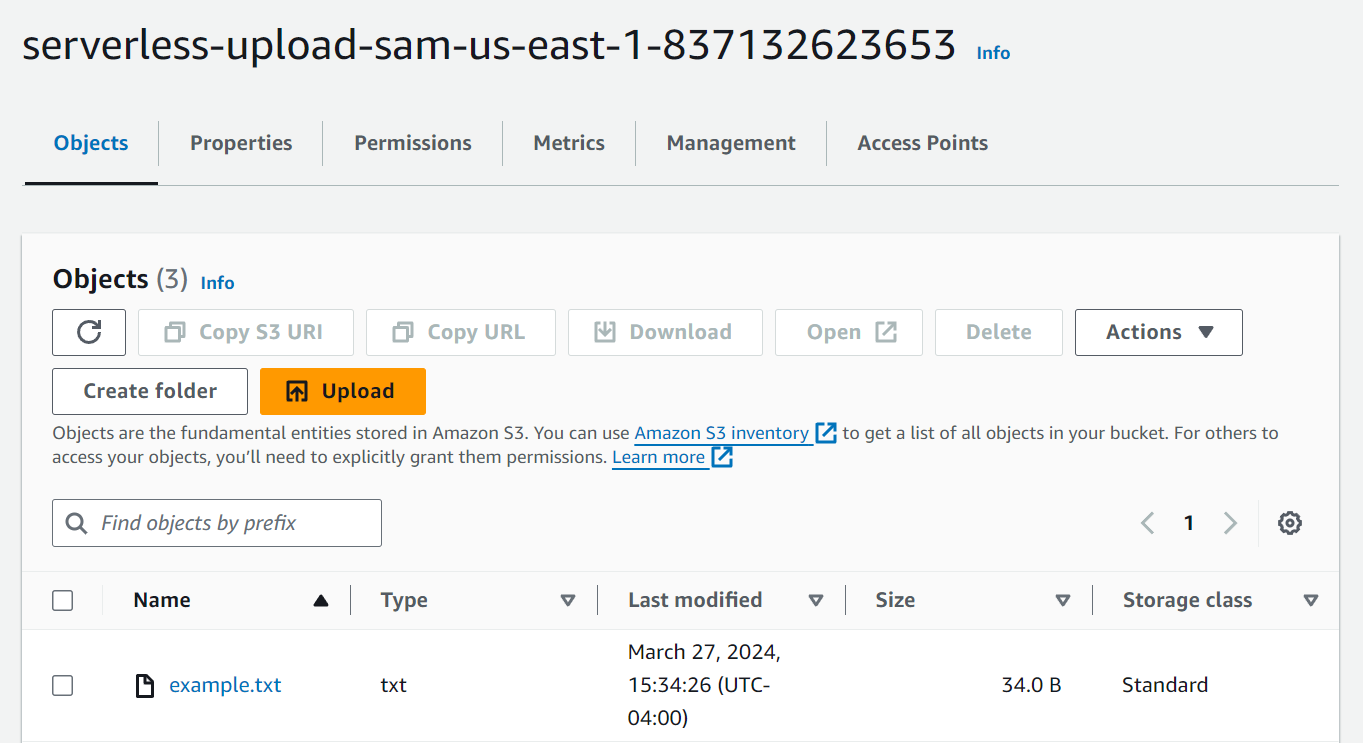
You should receive a successful response from the Lambda function and see the file in your S3 bucket.

Notice that this whole time, SAM took care of naming the bucket, providing that bucket name to the Lambda function as an environment variable, and creating the permissions needed. Abstractions like SAM allow you to reference resources with human-readable names in your code, while it provisions unique machine-friendly names that can be looked up at runtime.
Asynchronously Persist Metadata With Events
Uploading a file is cool enough, but we also want to persist the file’s metadata in a database so we can query the contents later. We can add a database just by updating the SAM template with a new resource. We’ll also add another Lambda function with the logic to read the file and save the metadata to Dynamodb.
We could update the existing file upload lambda to put the file into S3 and write the metadata to Dynamodb. However, we want to maintain a good separation of concerns and not have a single Lambda function doing too many things. Lambdas perform better when they are small, and we make the user experience better by returning a successful action as soon as it’s complete. The user doesn’t have to wait for multiple operations. We can take advantage of the event-driven nature of AWS resources by triggering a WriteMetadataFunction when S3 has a new object. This allows our service to asynchronously process the file when it lands inside the S3 bucket. We use this type of decoupling to reduce lambda execution times, which reduces the cost. It also doesn’t cost more to use S3 events, compared to triggering an SQS or SNS topic. You might want to use a more durable queue if you have to guarantee a certain order of operations, but in our case, an S3 event does what we want.
Let’s look at this updated template.yaml
The Dynamodb table we create has a Primary Key of FileId and a Sort Key of UploadDate , we also add a Global Secondary Index. The GSI has a synthetic primary key which allows us to query all of the rows by UploadDate, without having to specify the FileId. Dynamodb can seem confusing at first if you are used to relational databases, but it is all about Key-Value pairs. A synthetic key in DynamoDB, used with a Global Secondary Index (GSI), facilitates efficient queries on attributes like UploadDate. It serves as a constant partition key, allowing UploadDate to be the sort key, enabling streamlined range queries across the entire dataset without the constraints of the table's primary key structure. When we go to deploy this stack, you’ll see how fast you can add a database with minimal maintenance and avoid connection pools.
The two other new resources are a LambdaExecutionRole and a WriteMetadataFunction. The Lambda Execution Role defines the permissions that WriteMetadataFunction needs to do its job. These permissions are important to scope to “least privileges” to maintain a defensive security posture. This makes it more difficult for your Lambdas to have unintended access.
Now let’s look at the Lambda code that will write the metadata to Dynamodb.
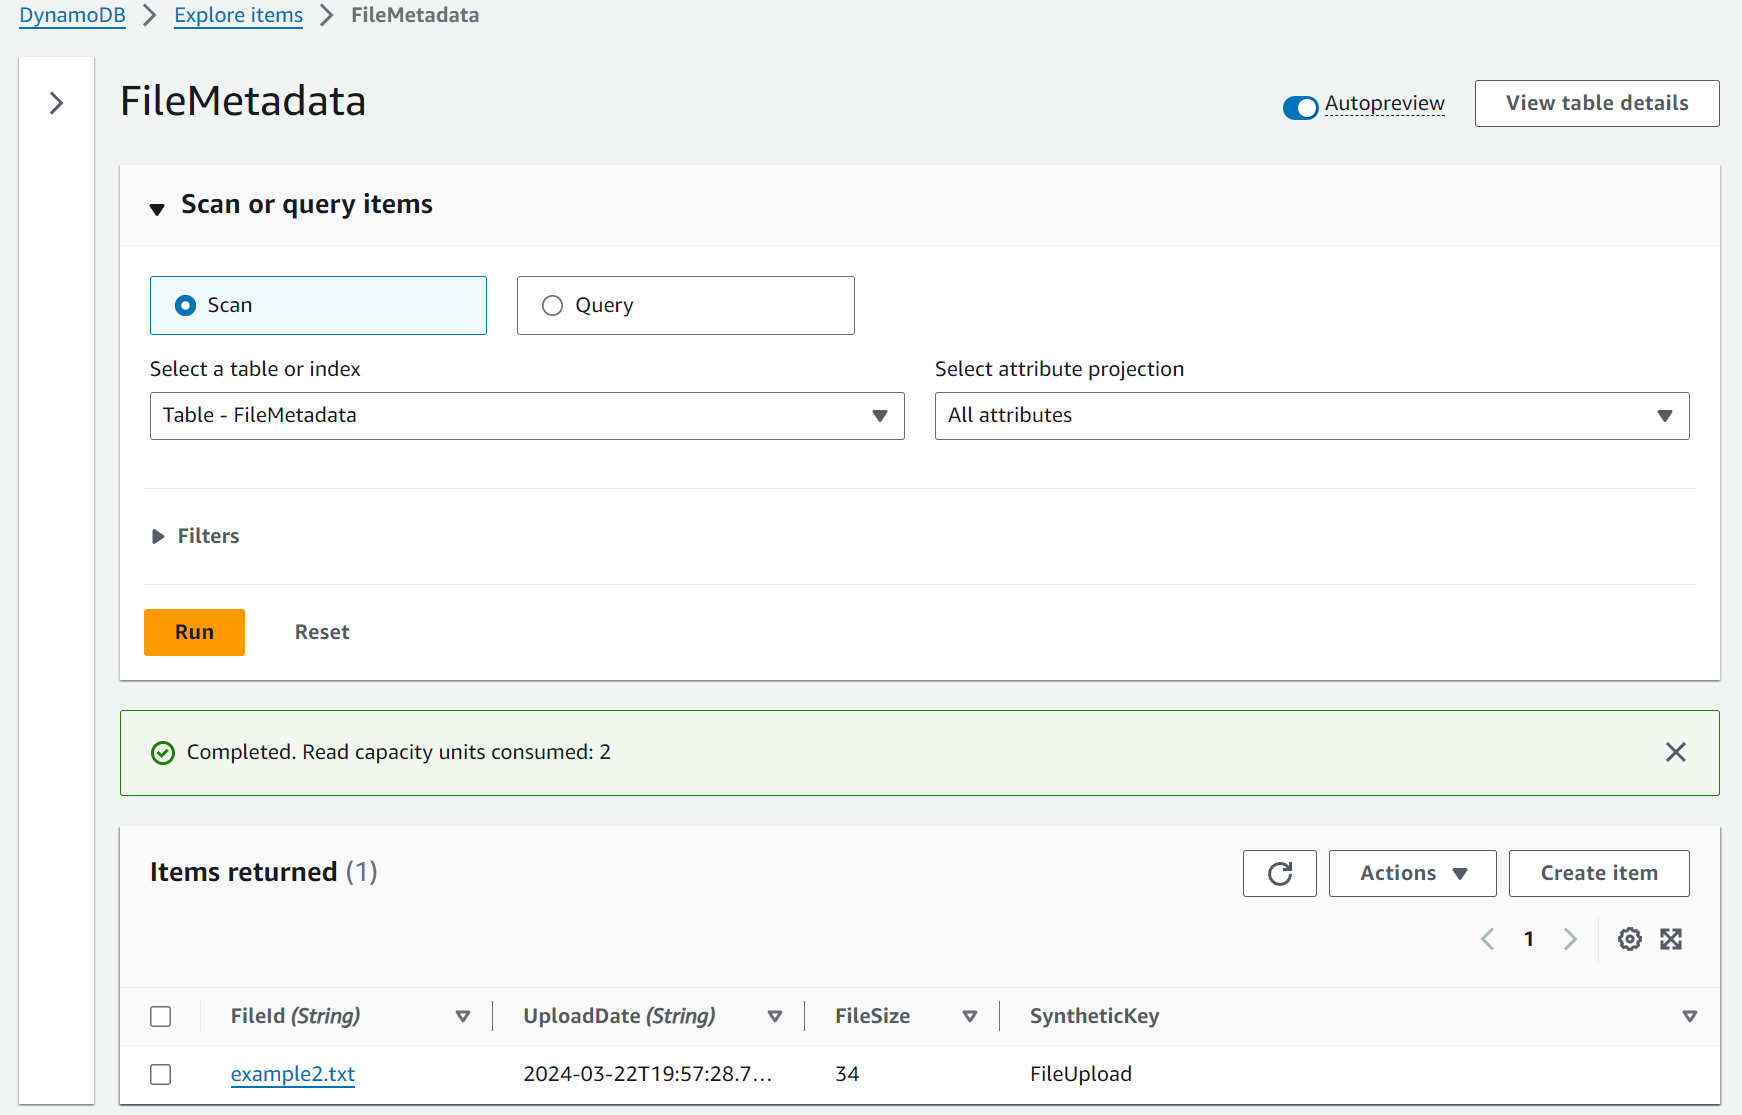
With the updated template and new function code, we can use the SAM CLI to build, validate, and deploy again. Take a look at your brand new Dynamodb table and issue a new curl command to upload another file, name it example2.txt to differentiate it.

The metadata was written to Dynamodb as a separate process triggered by a new object landing in the S3 bucket. You now have a slick decoupled event driven serverless service with deterministic deployments!
Finishing Up The Service
The final feature we need to add is a GET endpoint that triggers a Lambda to query Dynamodb. By now, you can guess that we will modify the SAM template with a new Lambda resource
The GetMetadataFunction resource defines a new Lambda with an Event trigger from API Gateway. SAM will associate this function with a new GET endpoint on our existing API Gateway. Isn’t that neat?
Go ahead and run $ sam build, $ sam validate, and $ sam deploy --guided as before. With this new function, we can curl the same API Gateway address on the /metadata route with a date range as a query parameter.
You should get a response like :
One neat thing about using the AWS Toolkit VSCode extension is that you can use AWS Application Composer to visualize your SAM template! Now you can see the visual architecture of the system we have built! It’s a little hard to find, but when you navigate to your template.yaml at the top you’ll see a link to “Visualize with Application Composer” and it will open a new tab in your IDE.


Conclusion
In this short walkthrough, we used a cloud environment provided by GitHub Codespaces to write and deploy a serverless service with SAM. The service uses an S3 Bucket, a Dynamodb table, and three Lambda functions to upload files, persist their metadata, and query the metadata by a date range.
The key concepts we learned about were how to use event sources to decouple your function executions and how to use a GSI with a synthetic key to access range keys on a single primary key.
We’ll continue this series deploying the same service with different tools, so stay tuned!
References:
Official AWS SAM developer documentation: https://docs.aws.amazon.com/serverless-application-model/latest/developerguide/what-is-sam.html
There are a lot of options when it comes to building serverless systems. In this series, we’ll build the same service with different frameworks and tools. We’ll highlight architecture decisions and discuss alternatives and their trade-offs along the way. You’ll learn about the many different ways services can be built with AWS. Cloud engineering is all about understanding requirements and making choices based on tradeoffs.


%20(1).svg)

.svg)


.webp)