

Introduction:
Building a Backend Application is crazy, and when it comes to sharing the endpoint to the front end or to your friends to use your application, it can look strange.
Suppose your friend comes to you asking why the URL looks so odd, and you say, “It’s a development endpoint”. Let’s learn how we can create a custom domain endpoint using different AWS services.
Requirements:
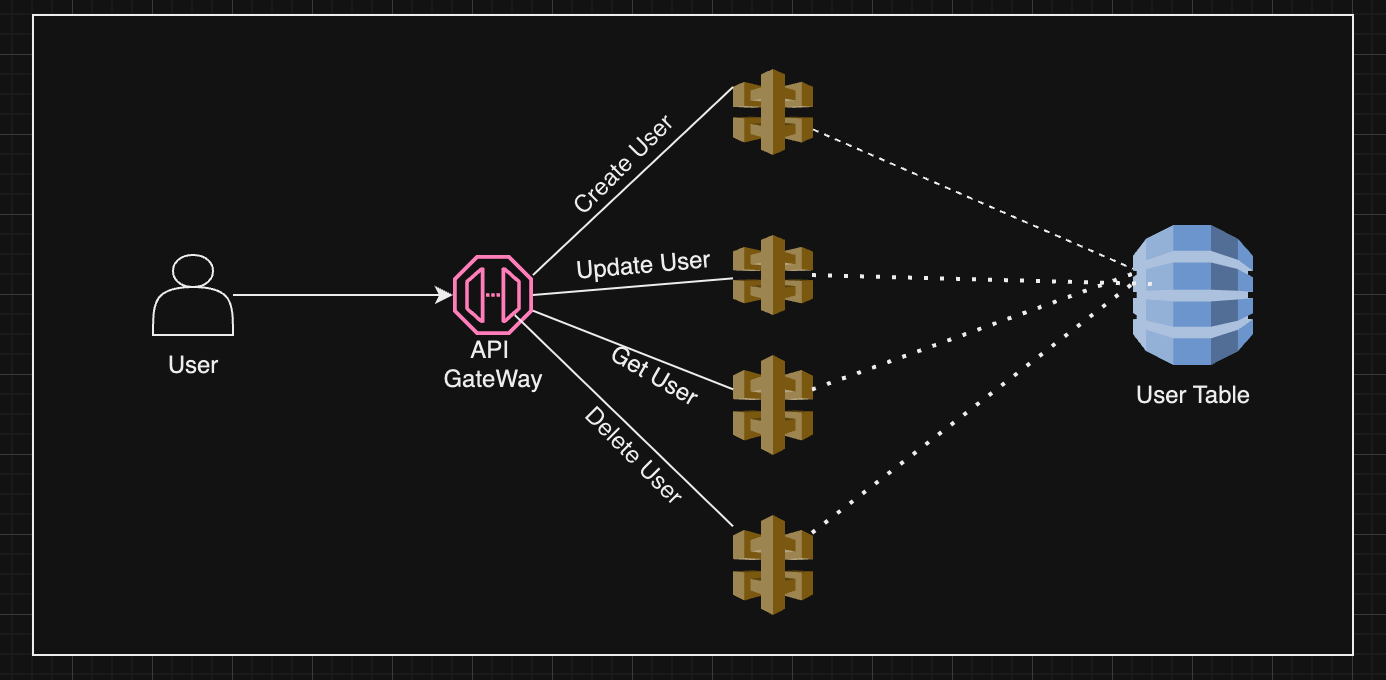
To host/create a custom domain, first, we need to have a backend application. As a prerequisite, I have created a simple CRUD app that will Create, Update, Get, and Delete User Info. To simplify the flow, below is the architectural diagram of the existing application:
Once you have the application ready, we can make use of these AWS Services: Route53, ACM Certificate, API Gateway Custom Domain.
- Route53: Route53 is an AWS Service, a highly available and scalable Domain Name System(DNS). It offers three services: register domain, health checks, and DNS Routing.
- Register Domain: Route53 lets you register a name for your website or application.
- Health Checks: Route53 sends an active request to your server to check if it's available.
- DNS Routing: Route53 helps the user connect with your app when they search in the browser.
- ACM Certificate: ACM certificate provides an SSL/TLS certificate for your web application or website to secure and protect the application by creating, storing, and renewing the certificate.
- API Gateway Custom Domain: When you deploy your API then you will get a URL to invoke which looks like this below:
https://api-id.execute-api.region.amazonaws.com/stageWhere:
- api-id: is the unique id generated for your API.
- region: a region where your API is deployed.
- stage: stage of deployment you did for your API.
The API-id is a randomly generated string value that can be anything like “i3lzy9qo2456”, which is hard to remember and might also be exposed to fraud or hacking. To resolve this we can choose a name that is easier to remember, which can be achieved by using a custom domain. Once we register the domain the API endpoint will look something like this:
https://backend-application-hosted.comNow let's break down the solution to achieve the custom domain naming for your backend application.
Architecture Solution Flow:
While building a solution I had three questions in my mind: How to create a custom domain? How to secure the custom domain? How can I map my API gateway with a custom name?
As we discussed with the different AWS services, we can conquer each by using Route53 to create a custom domain, ACM to secure the application, and finally, API gateway to map custom names. With the help of this let's build a solution that looks something like below:
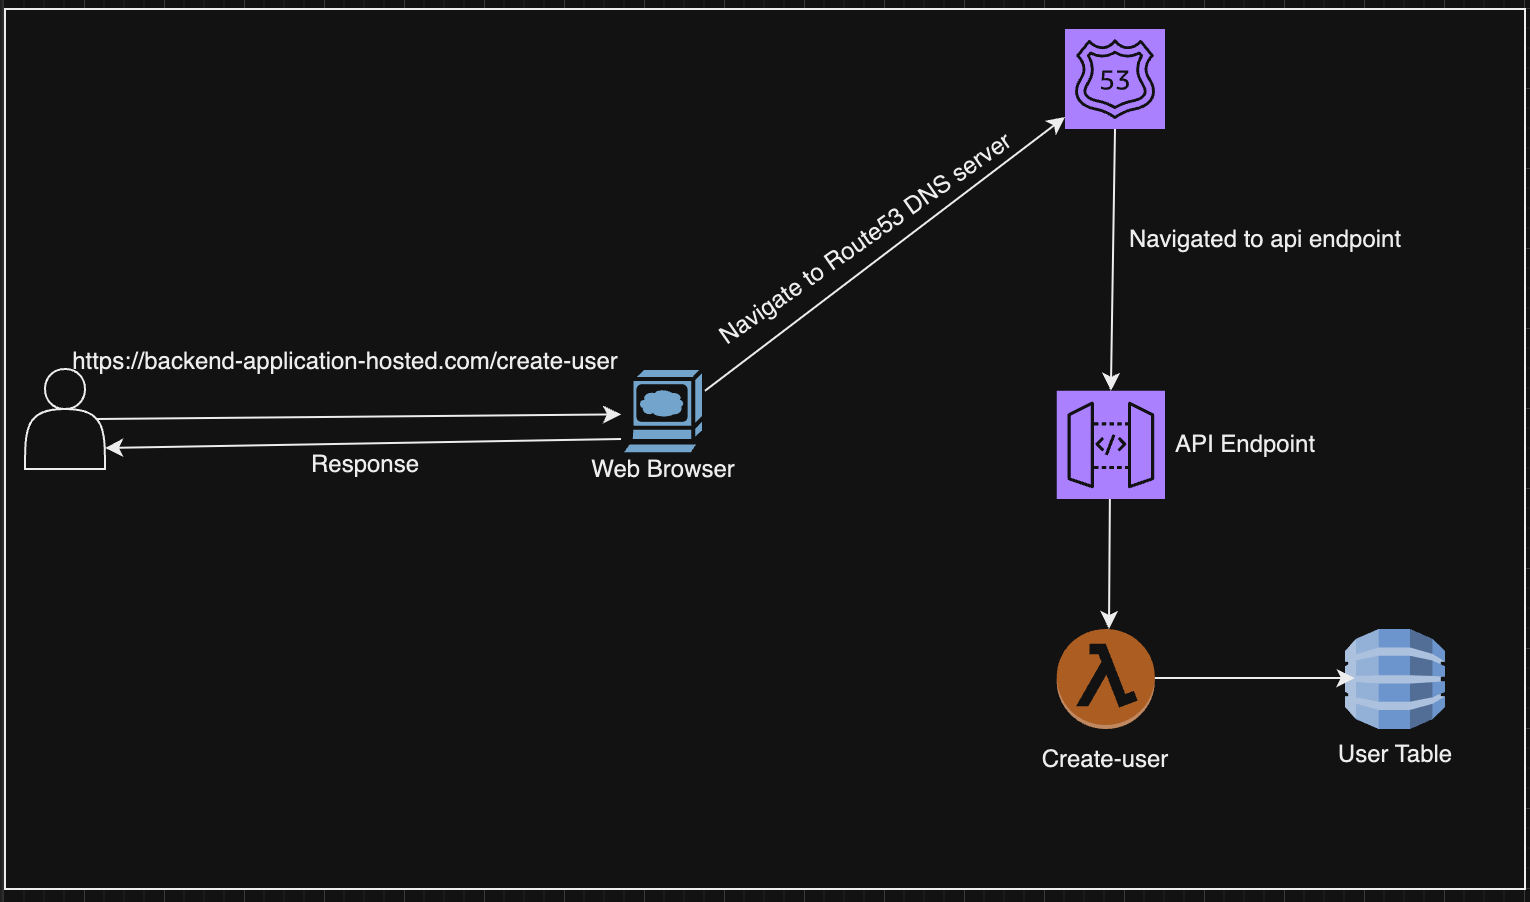
Let’s breakdown the process a bit.
- Suppose a User requests the custom domain endpoint to create a user.
- The browser redirects the endpoint to Route53, which checks for the TLD(Top Level Domain) and navigates to the DNS subdomain server.
- Once the NS record is found to be mapped, this will now check if there is any type of Alias in the hosted zone of Route53.
- If the type Alias is mapped to the custom domain of the API gateway, then the request is sent to the API gateway, which goes to the respective lambda and gives back the response.
Are you confused with the TLD, DNS subdomain, Hosted Zone, and Alias record? Here is a brief explanation of a few terms which will be used throughout the blog.
Domain Name: Domain Name is the name that you give for your application in our case “backend-application-hosted.com”.
Domain Name System(DNS): A Network that helps computers, and phones to connect with IP-enable devices. which converts the domain name to an IP address.
IP address: A number assigned to each device, which helps to communicate with other devices. route53 supports IPv4 & IPv6.
TLD(Top Level Domain): TLD is the .com or .in your custom domain name.
DNS Subdomain: The Subdomain is the name before .com and after www. In our case, the subdomain is “backend-application-hosted”.
Alias Record: Alias Record is a type of hosted zone record that maps for the other AWS service.
Implementation:
Creating a custom domain name involves a different process, let's break it down into bullet points so we can keep track:
- Register the domain name with “backend-application-hosted.com”
- The hosted zone should be created with the same name as the domain name.
- Create an ACM certificate with the same name as the domain name.
- Add this created certificate to the hosted zone of the registered domain.
- In the API gateway, you should create a custom domain name with the same name as the registered domain name.
- Include the ACM certificate to the API gateway custom domain
- Add this custom domain to the hosted zone record with the type alias.
- Add API mapping to the custom domain.
Step 1: Register Domain Name.
One of the key features of Route53 is that we can register the domain directly without any third party. The first step to registering the domain is to check for the availability of that name, and if found select the domain and proceed to the next steps.
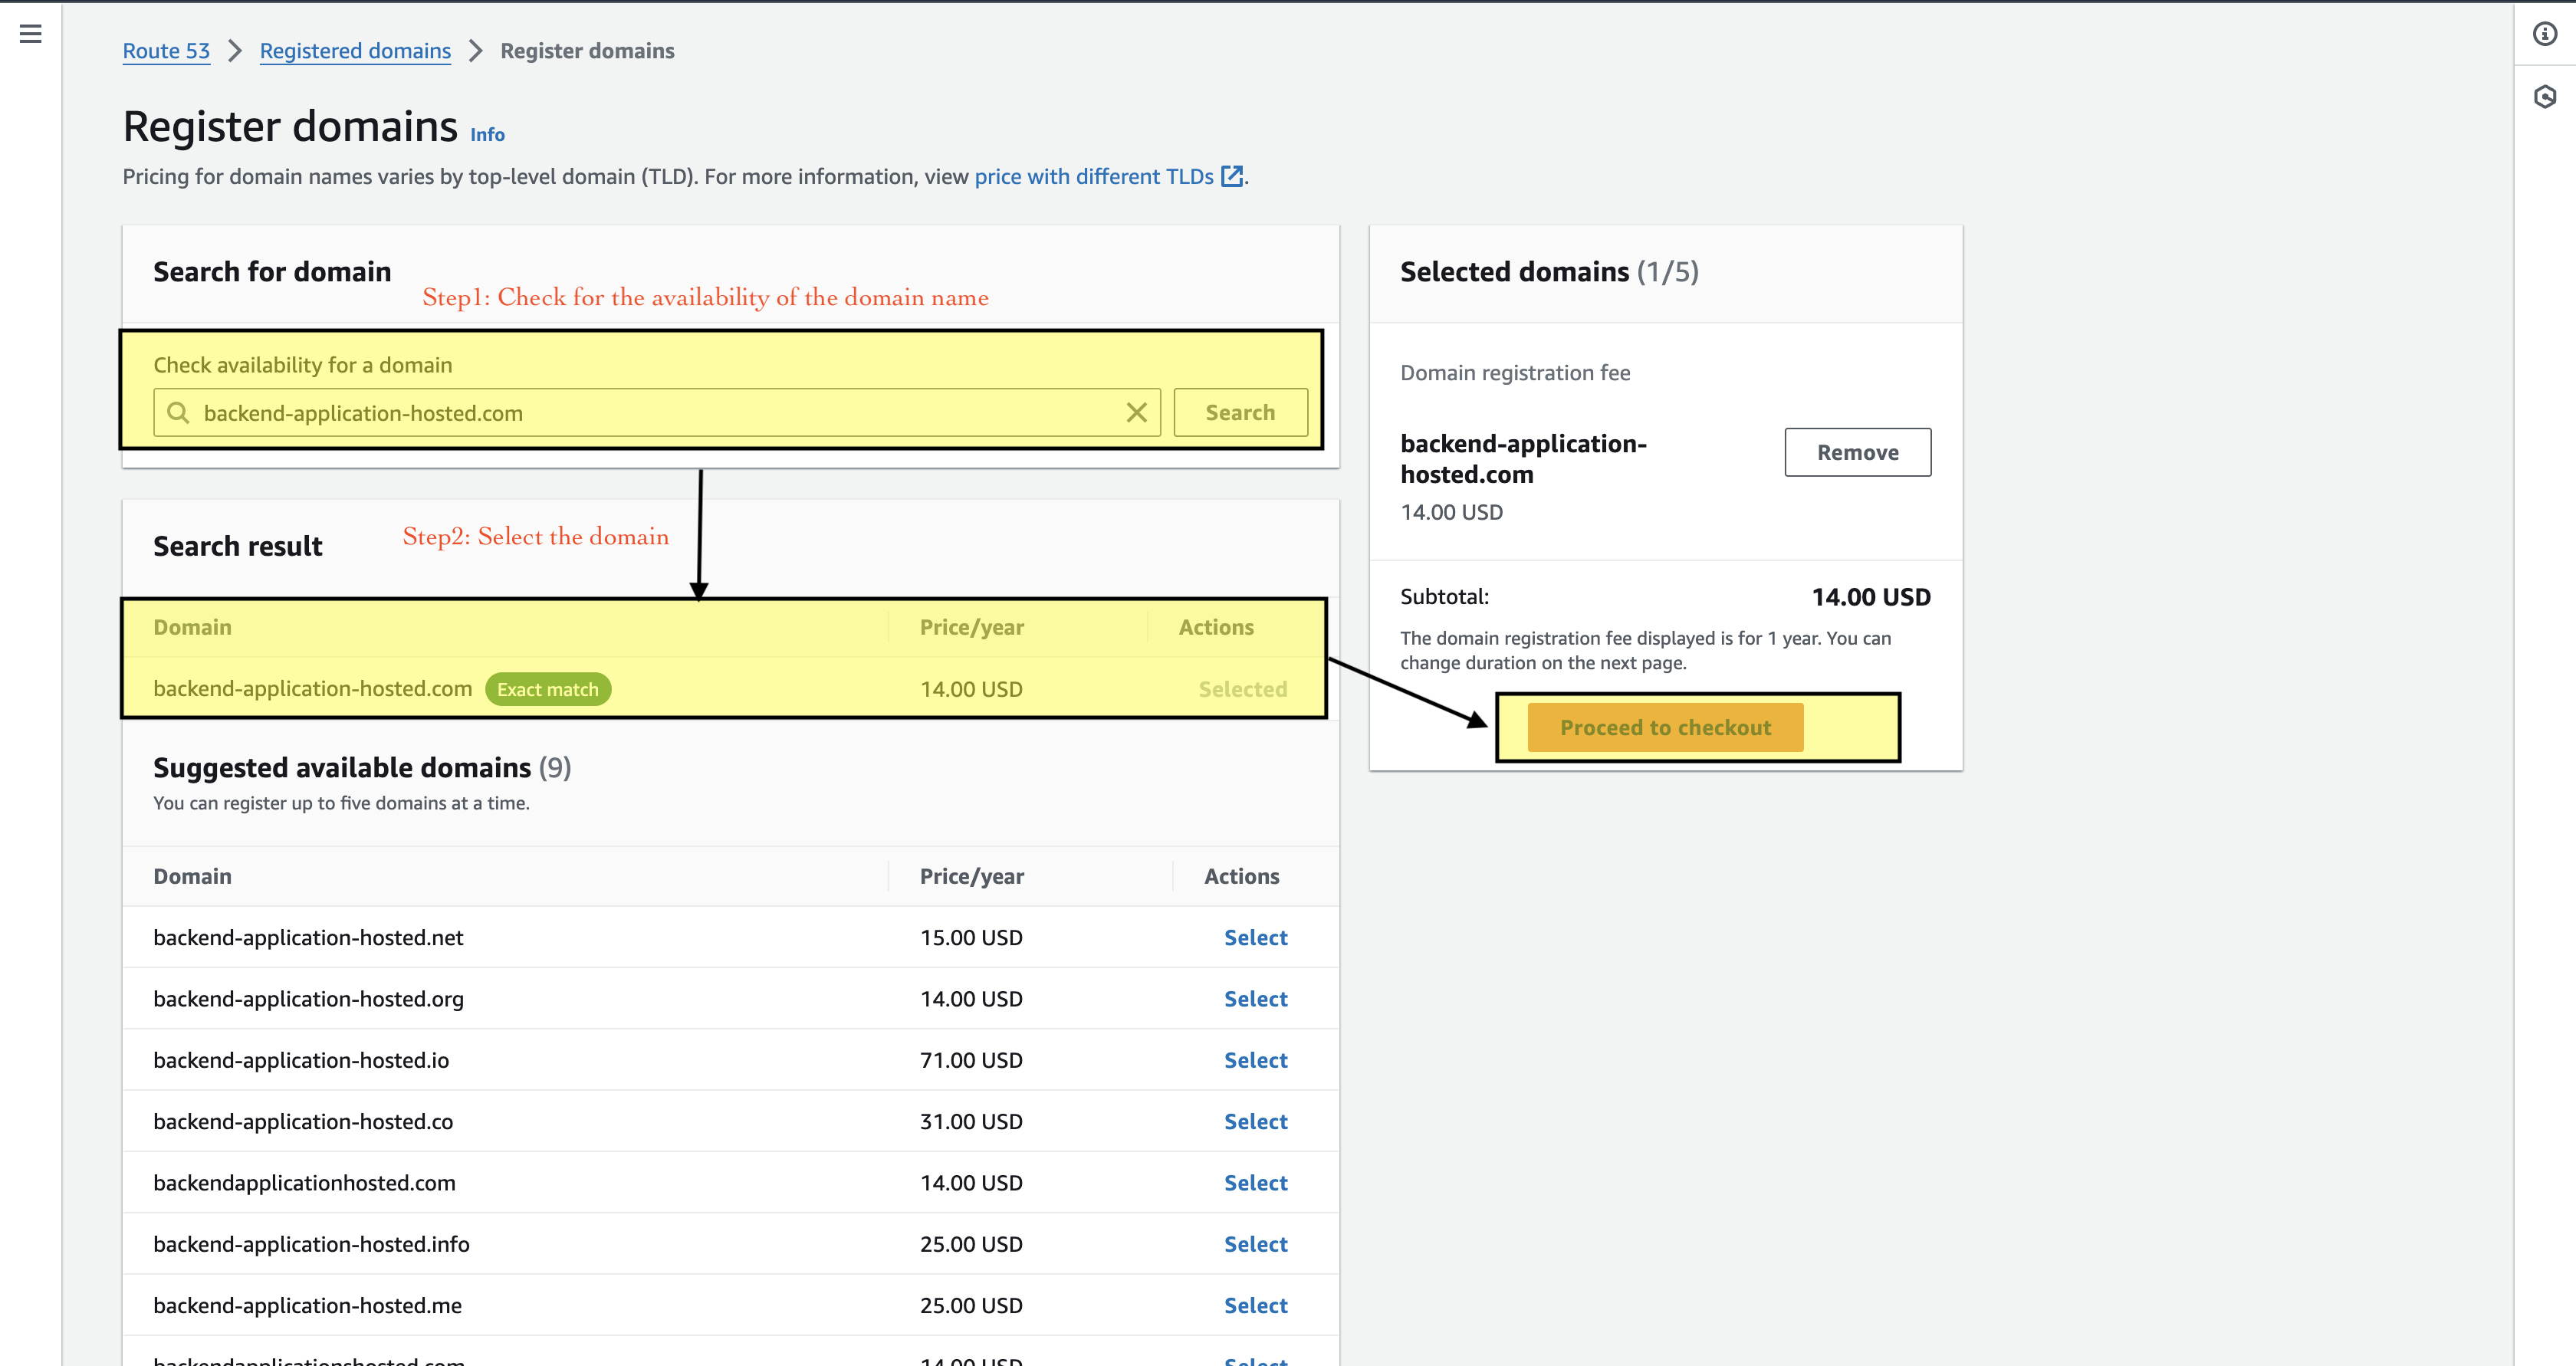
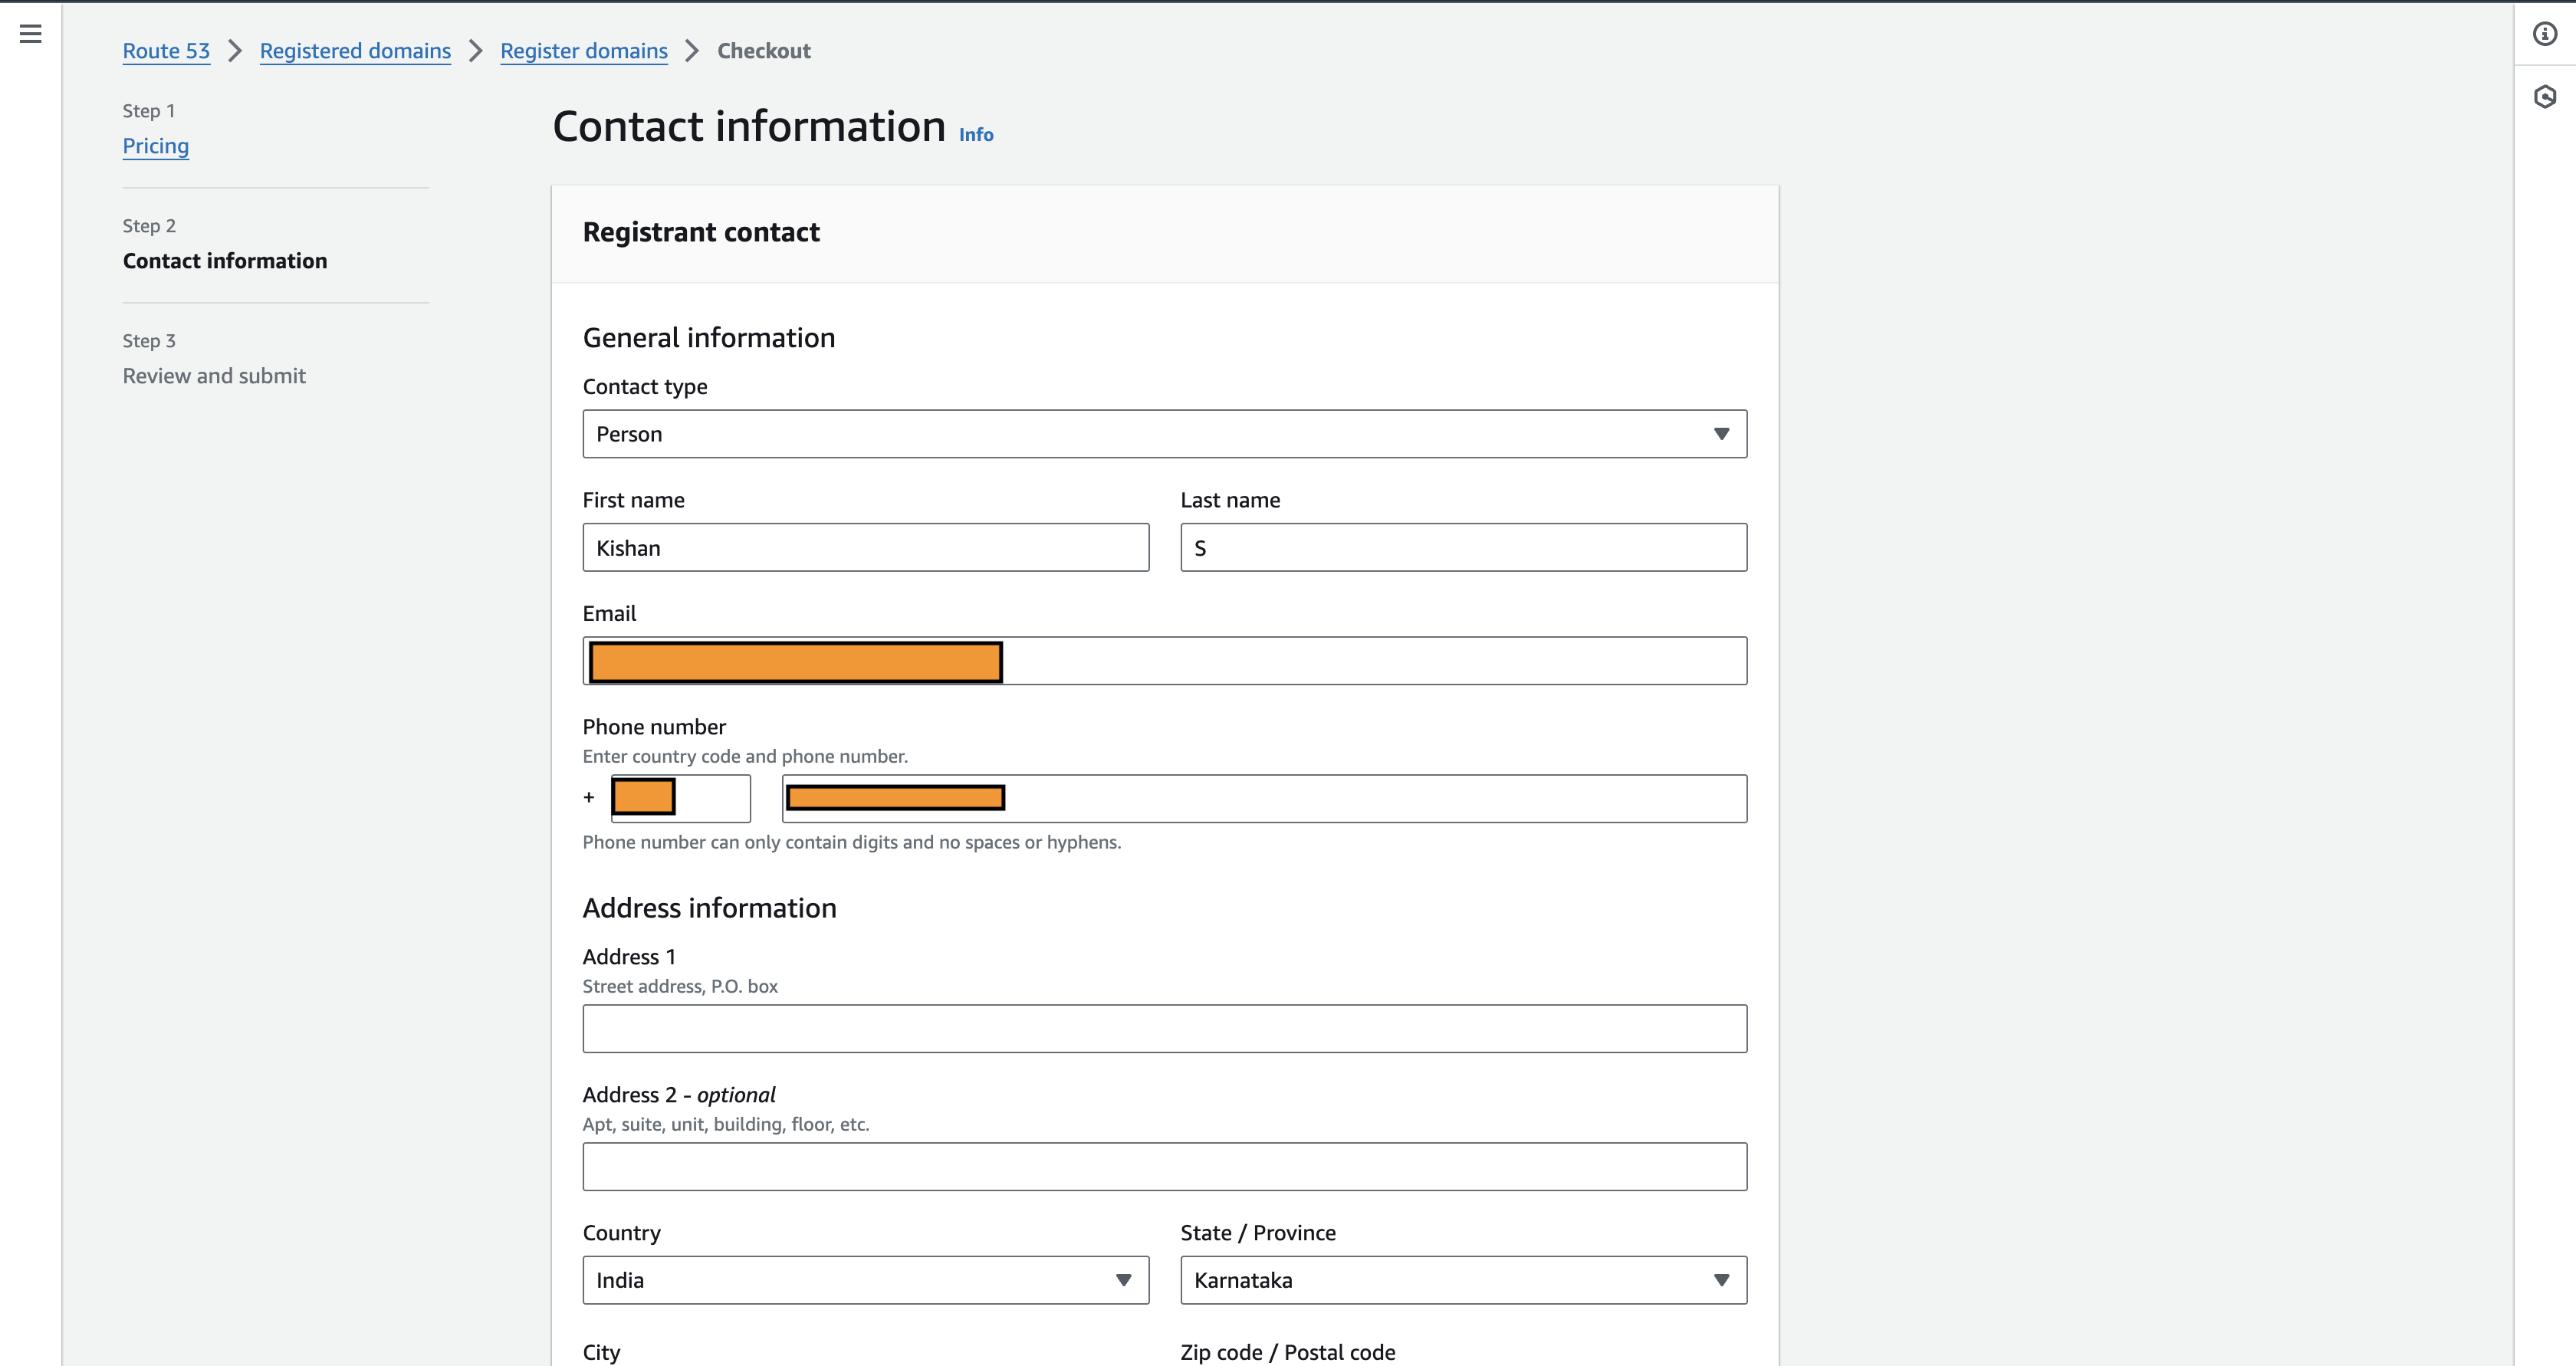
By proceeding to the next step AWS asks for the personal information, once done with filling the personal information, review the details entered and apply for the domain.
Once the request is made it will be in pending status, it usually takes 5-10 min to verify the info provided and get your domain ready with the hosted zone record created with the same name as the domain name with NS records mapped for the DNS server.
Step 2: ACM Certificate
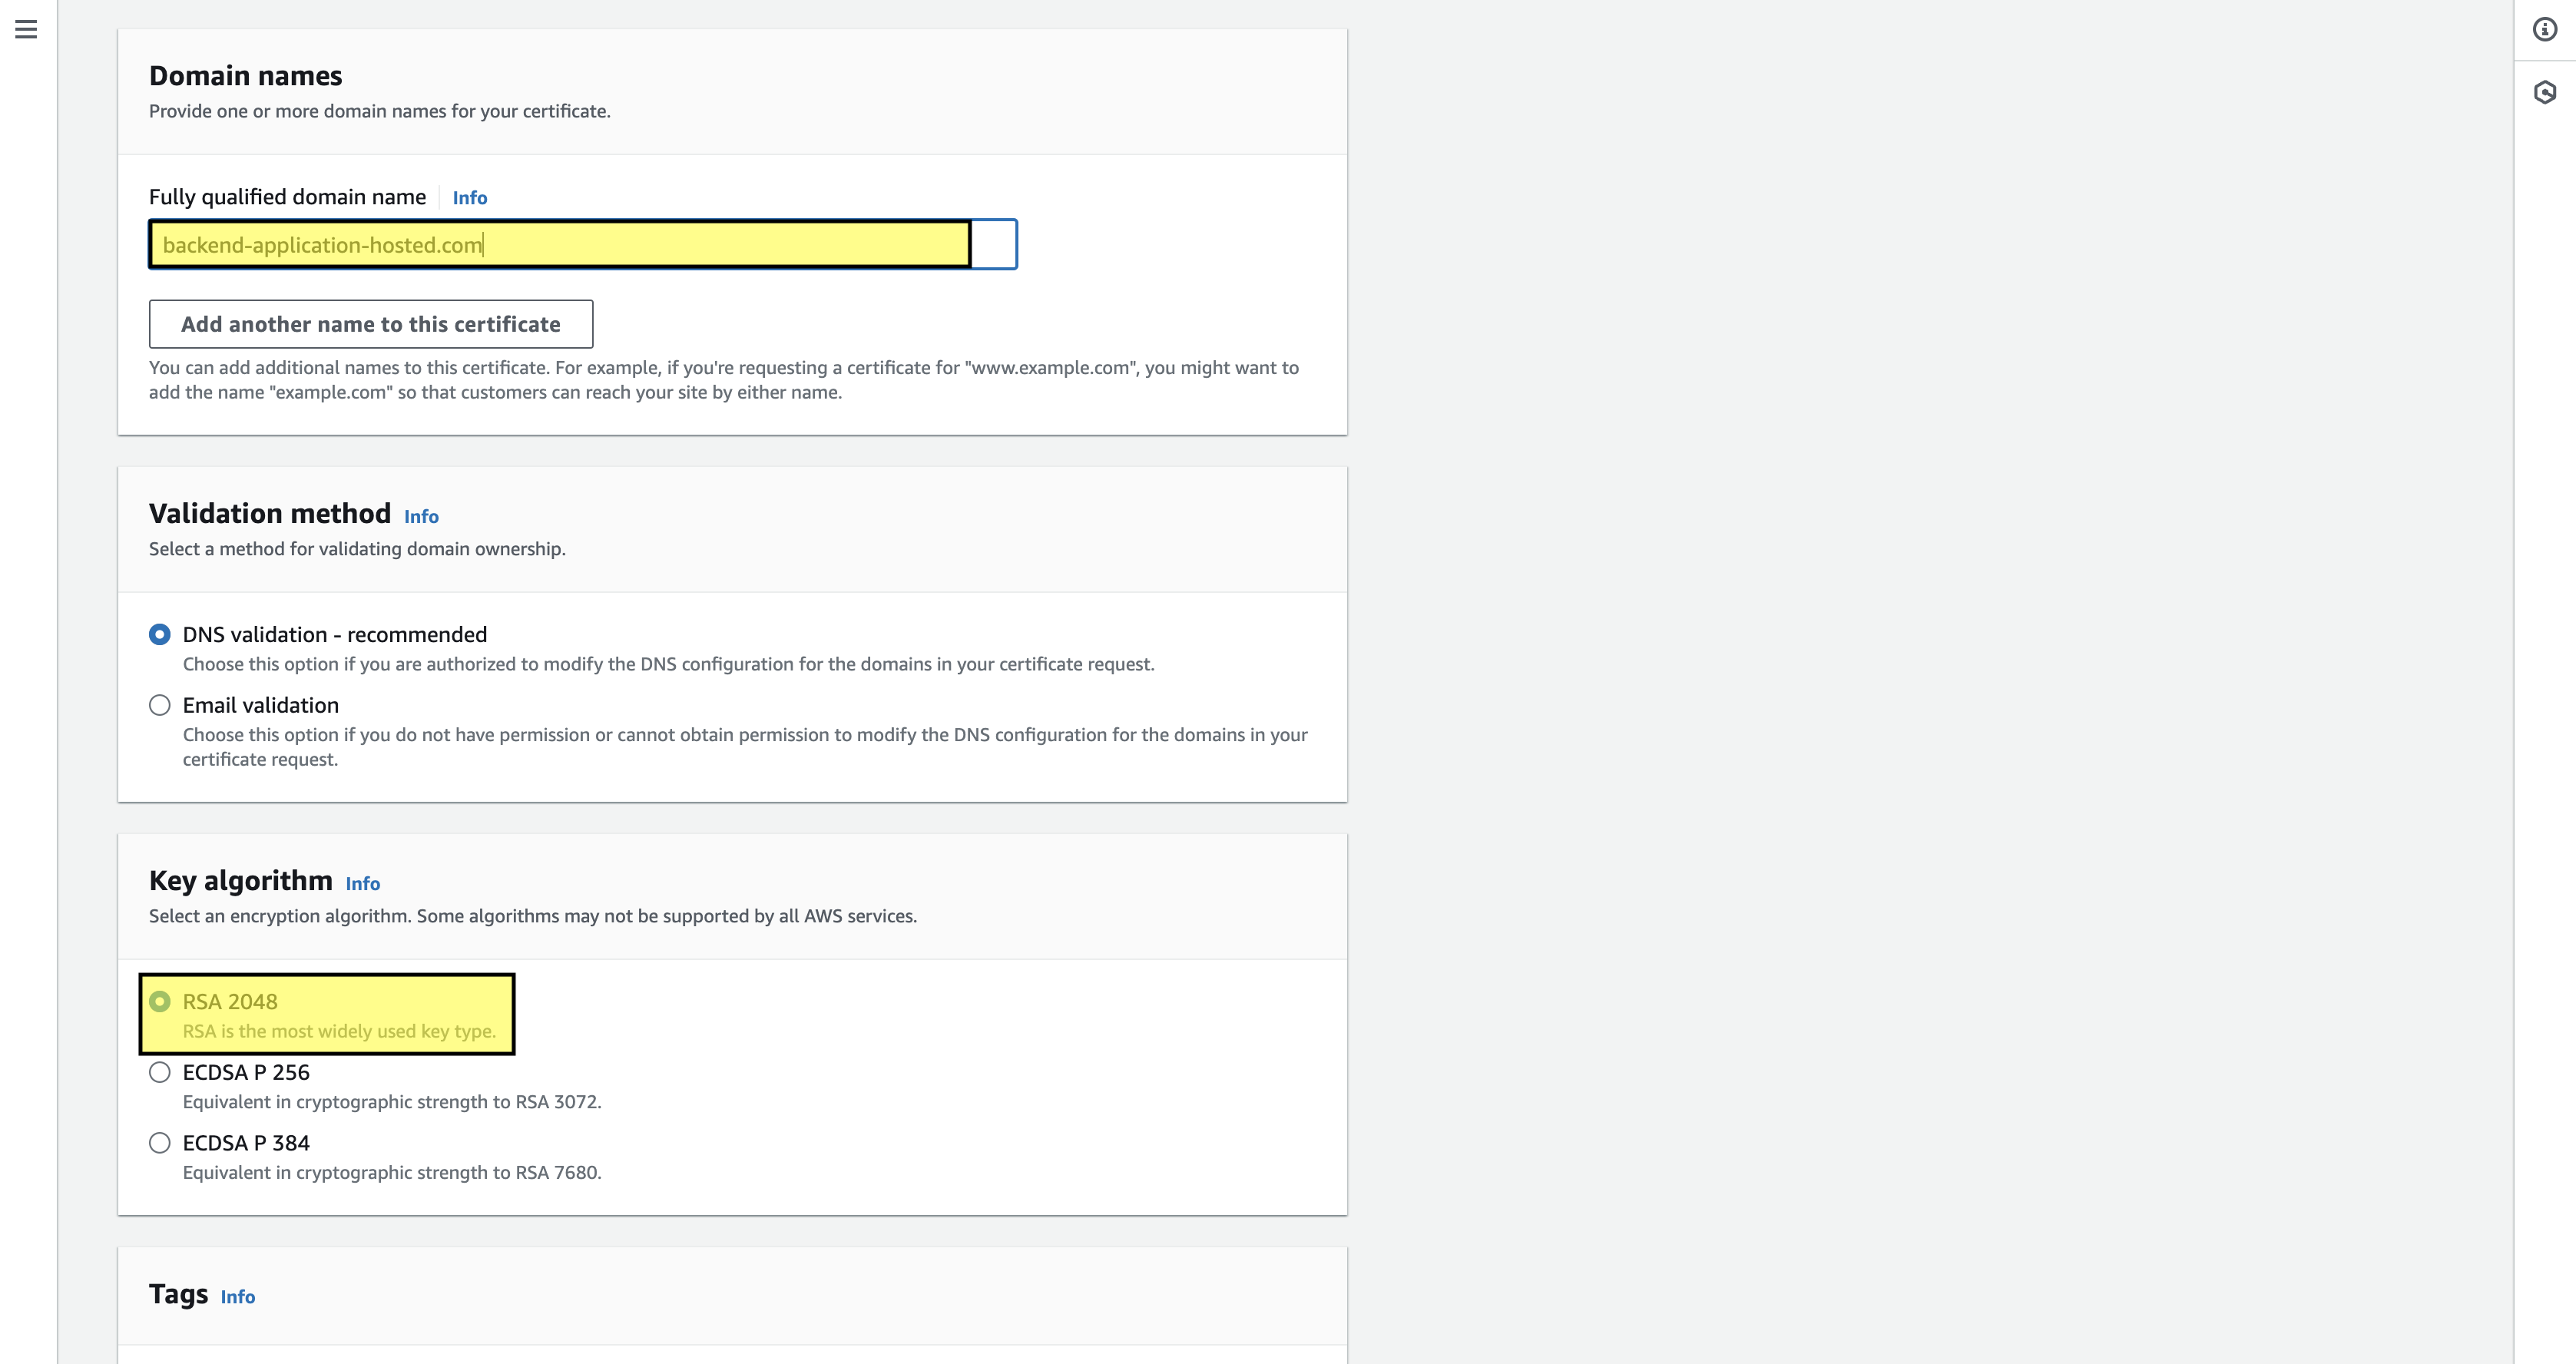
Once the domain registration is completed the next step is to have an ACM certificate record created in the hosted zone, so that AWS secures & protects the domain. To create an ACM certificate, navigate to the service in the console, and get started by filling a fully qualified domain name that we have registered as the key algorithm. Now select the most used algorithm, RSA-2048, and create the certificate.
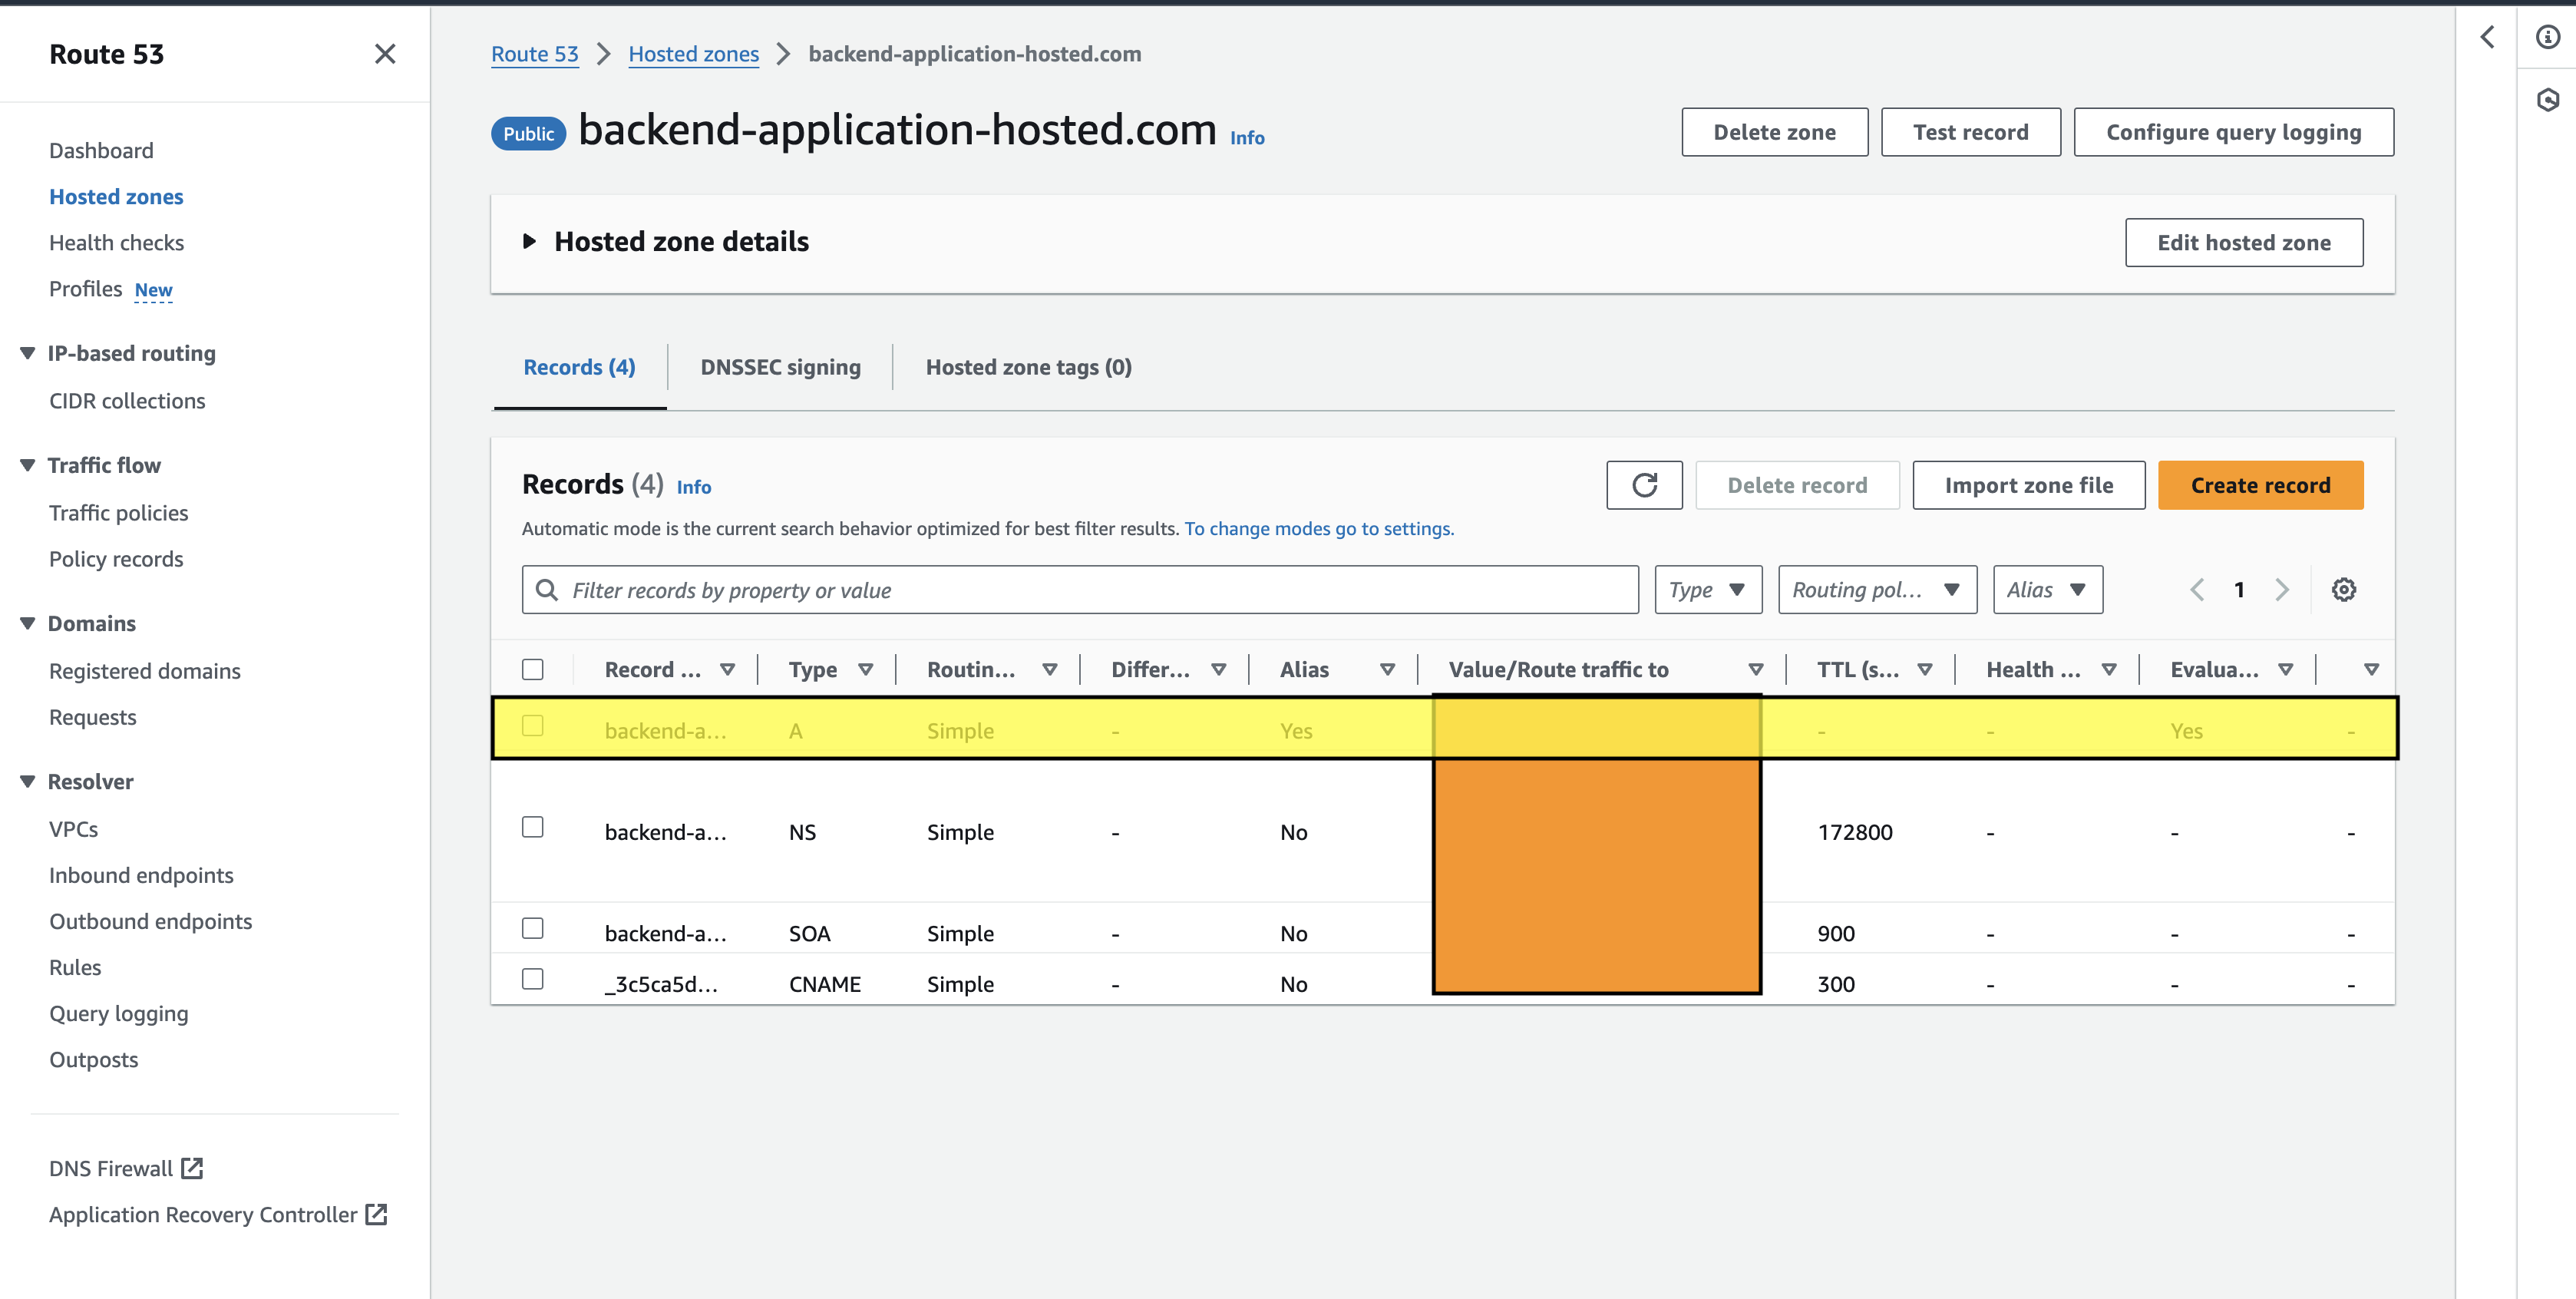
Once the certificate is created it will be in pending status until we add the domain to the hosted zone. The Domain will have the Type & CNAME name that we need to use in route53 to have the record. To do that click on the create a record in route53, and it will navigate to the route53 console to create a CNAME record.
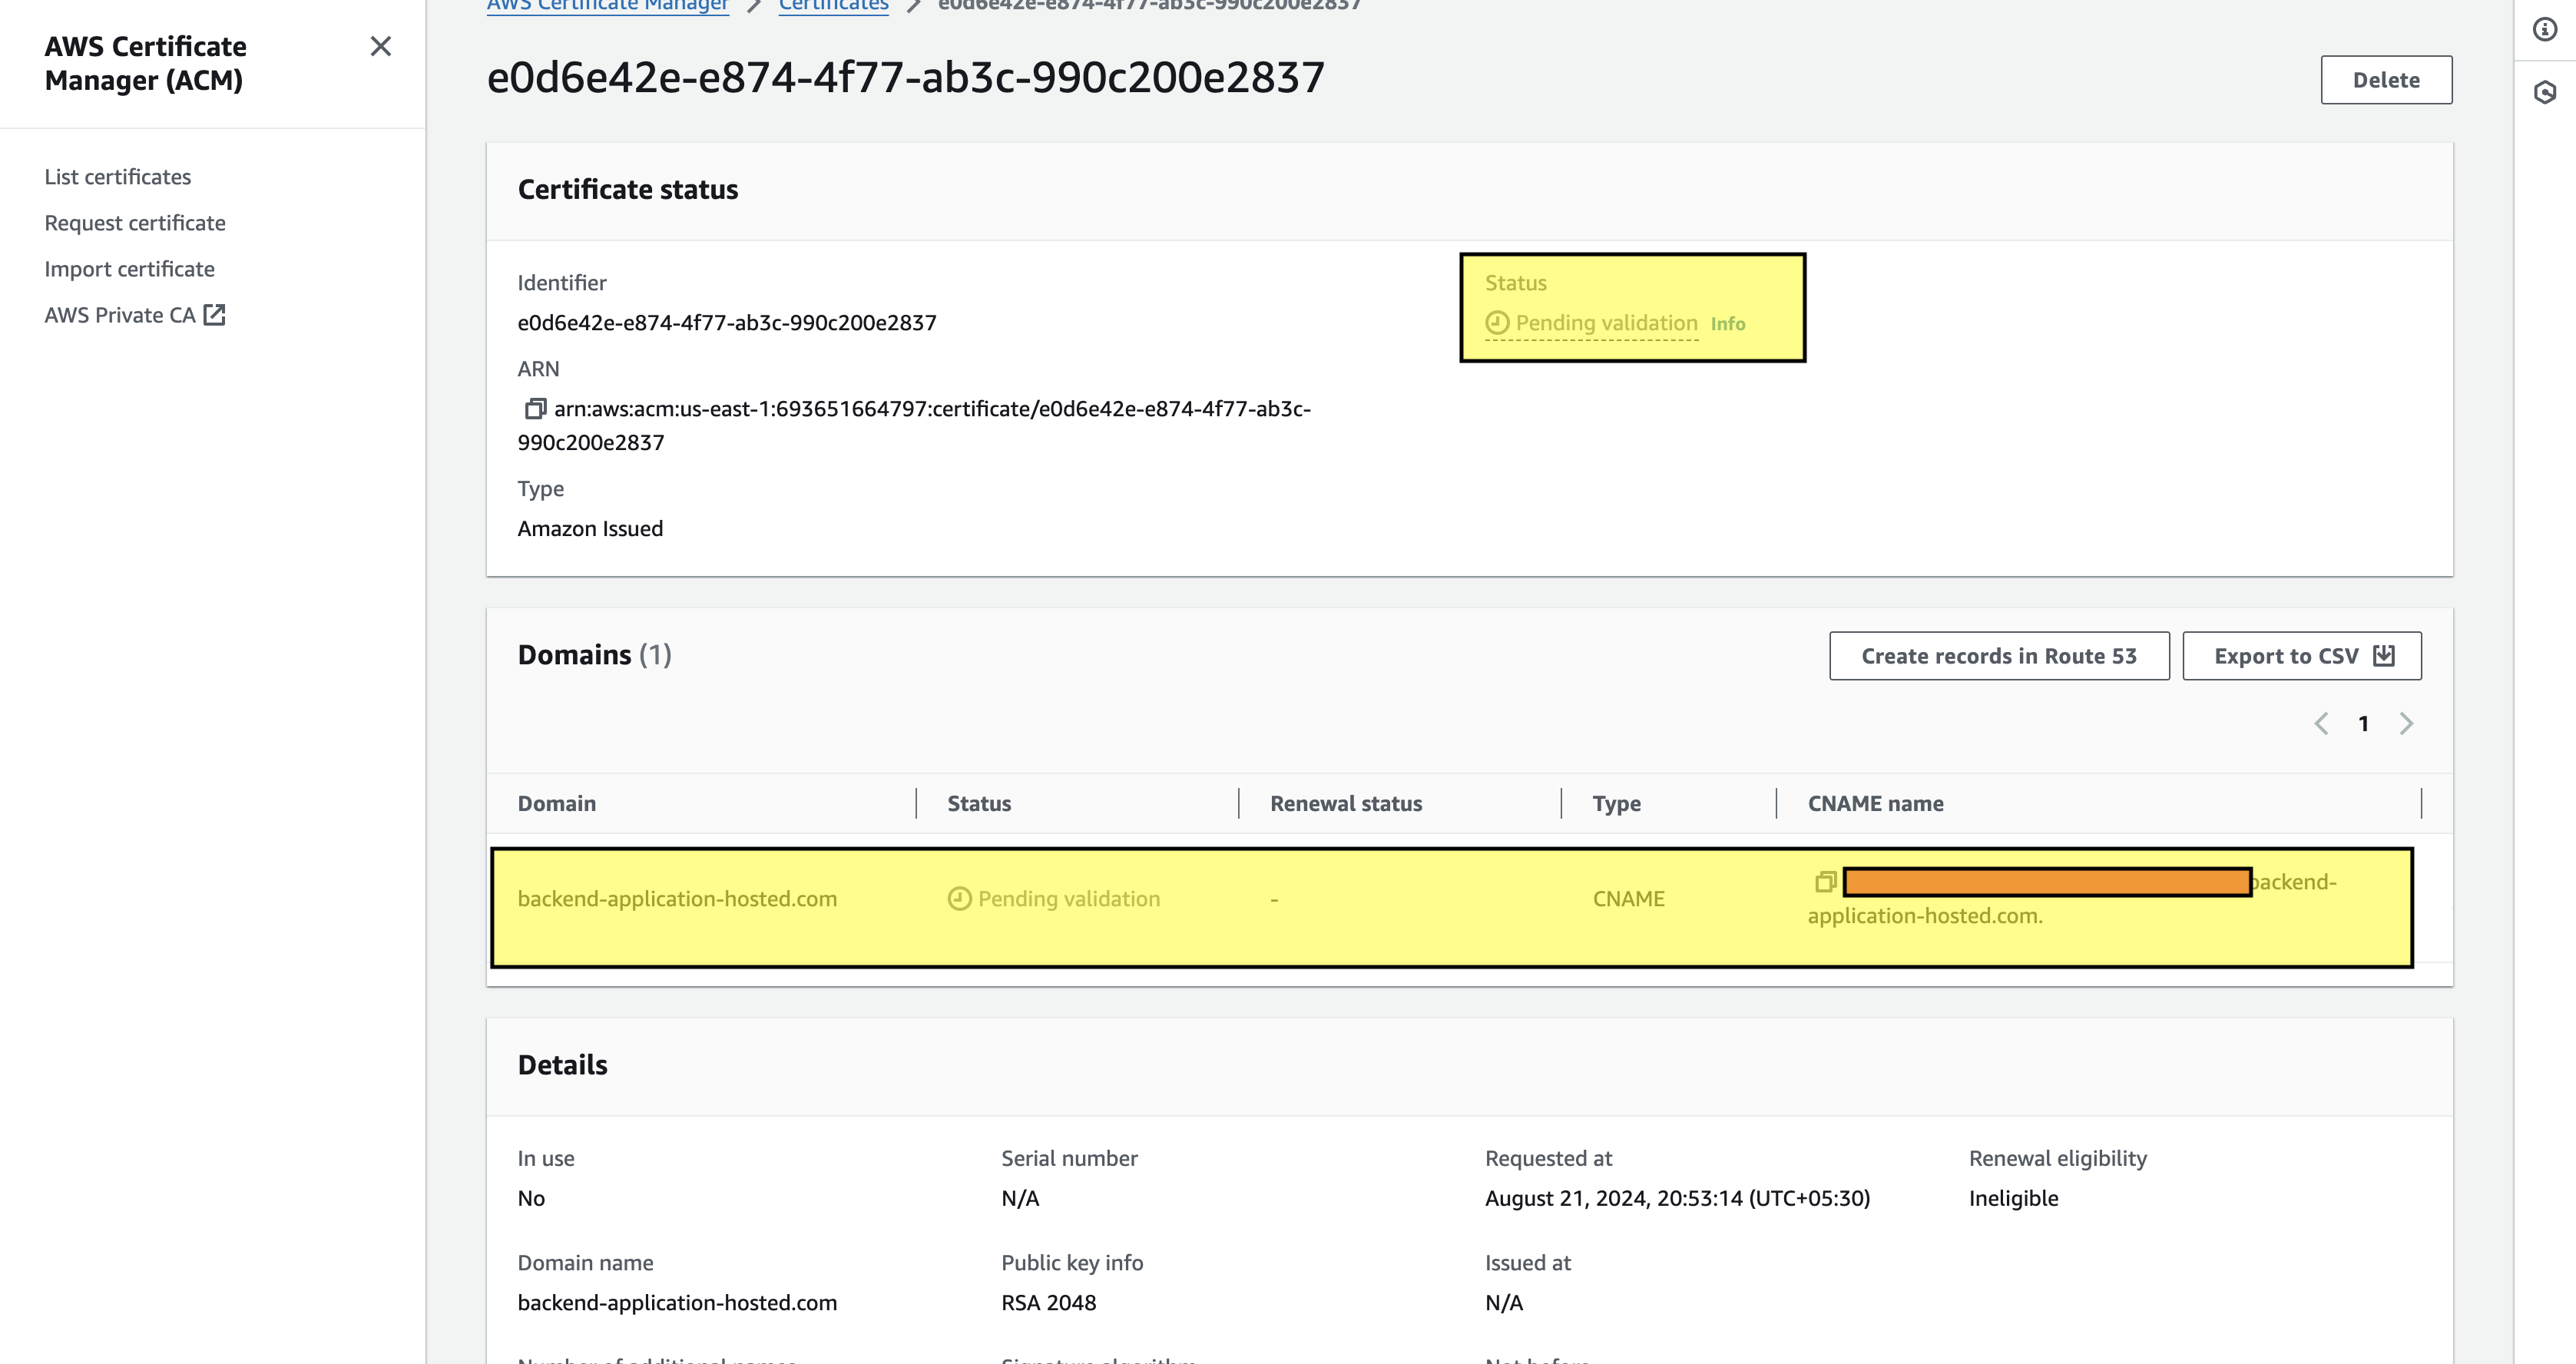
All the fields will be auto-filled with the Record name which is the same as the CNAME name and the record type is of CNAME, with the value entered, and a TTL is provided with the routing policy as simple, once all this field is mapped, click on create records and this will create a record in the hosted zone. Within 5 minutes ACM Certificate will be validated and can be issued to API Gateway custom domain.

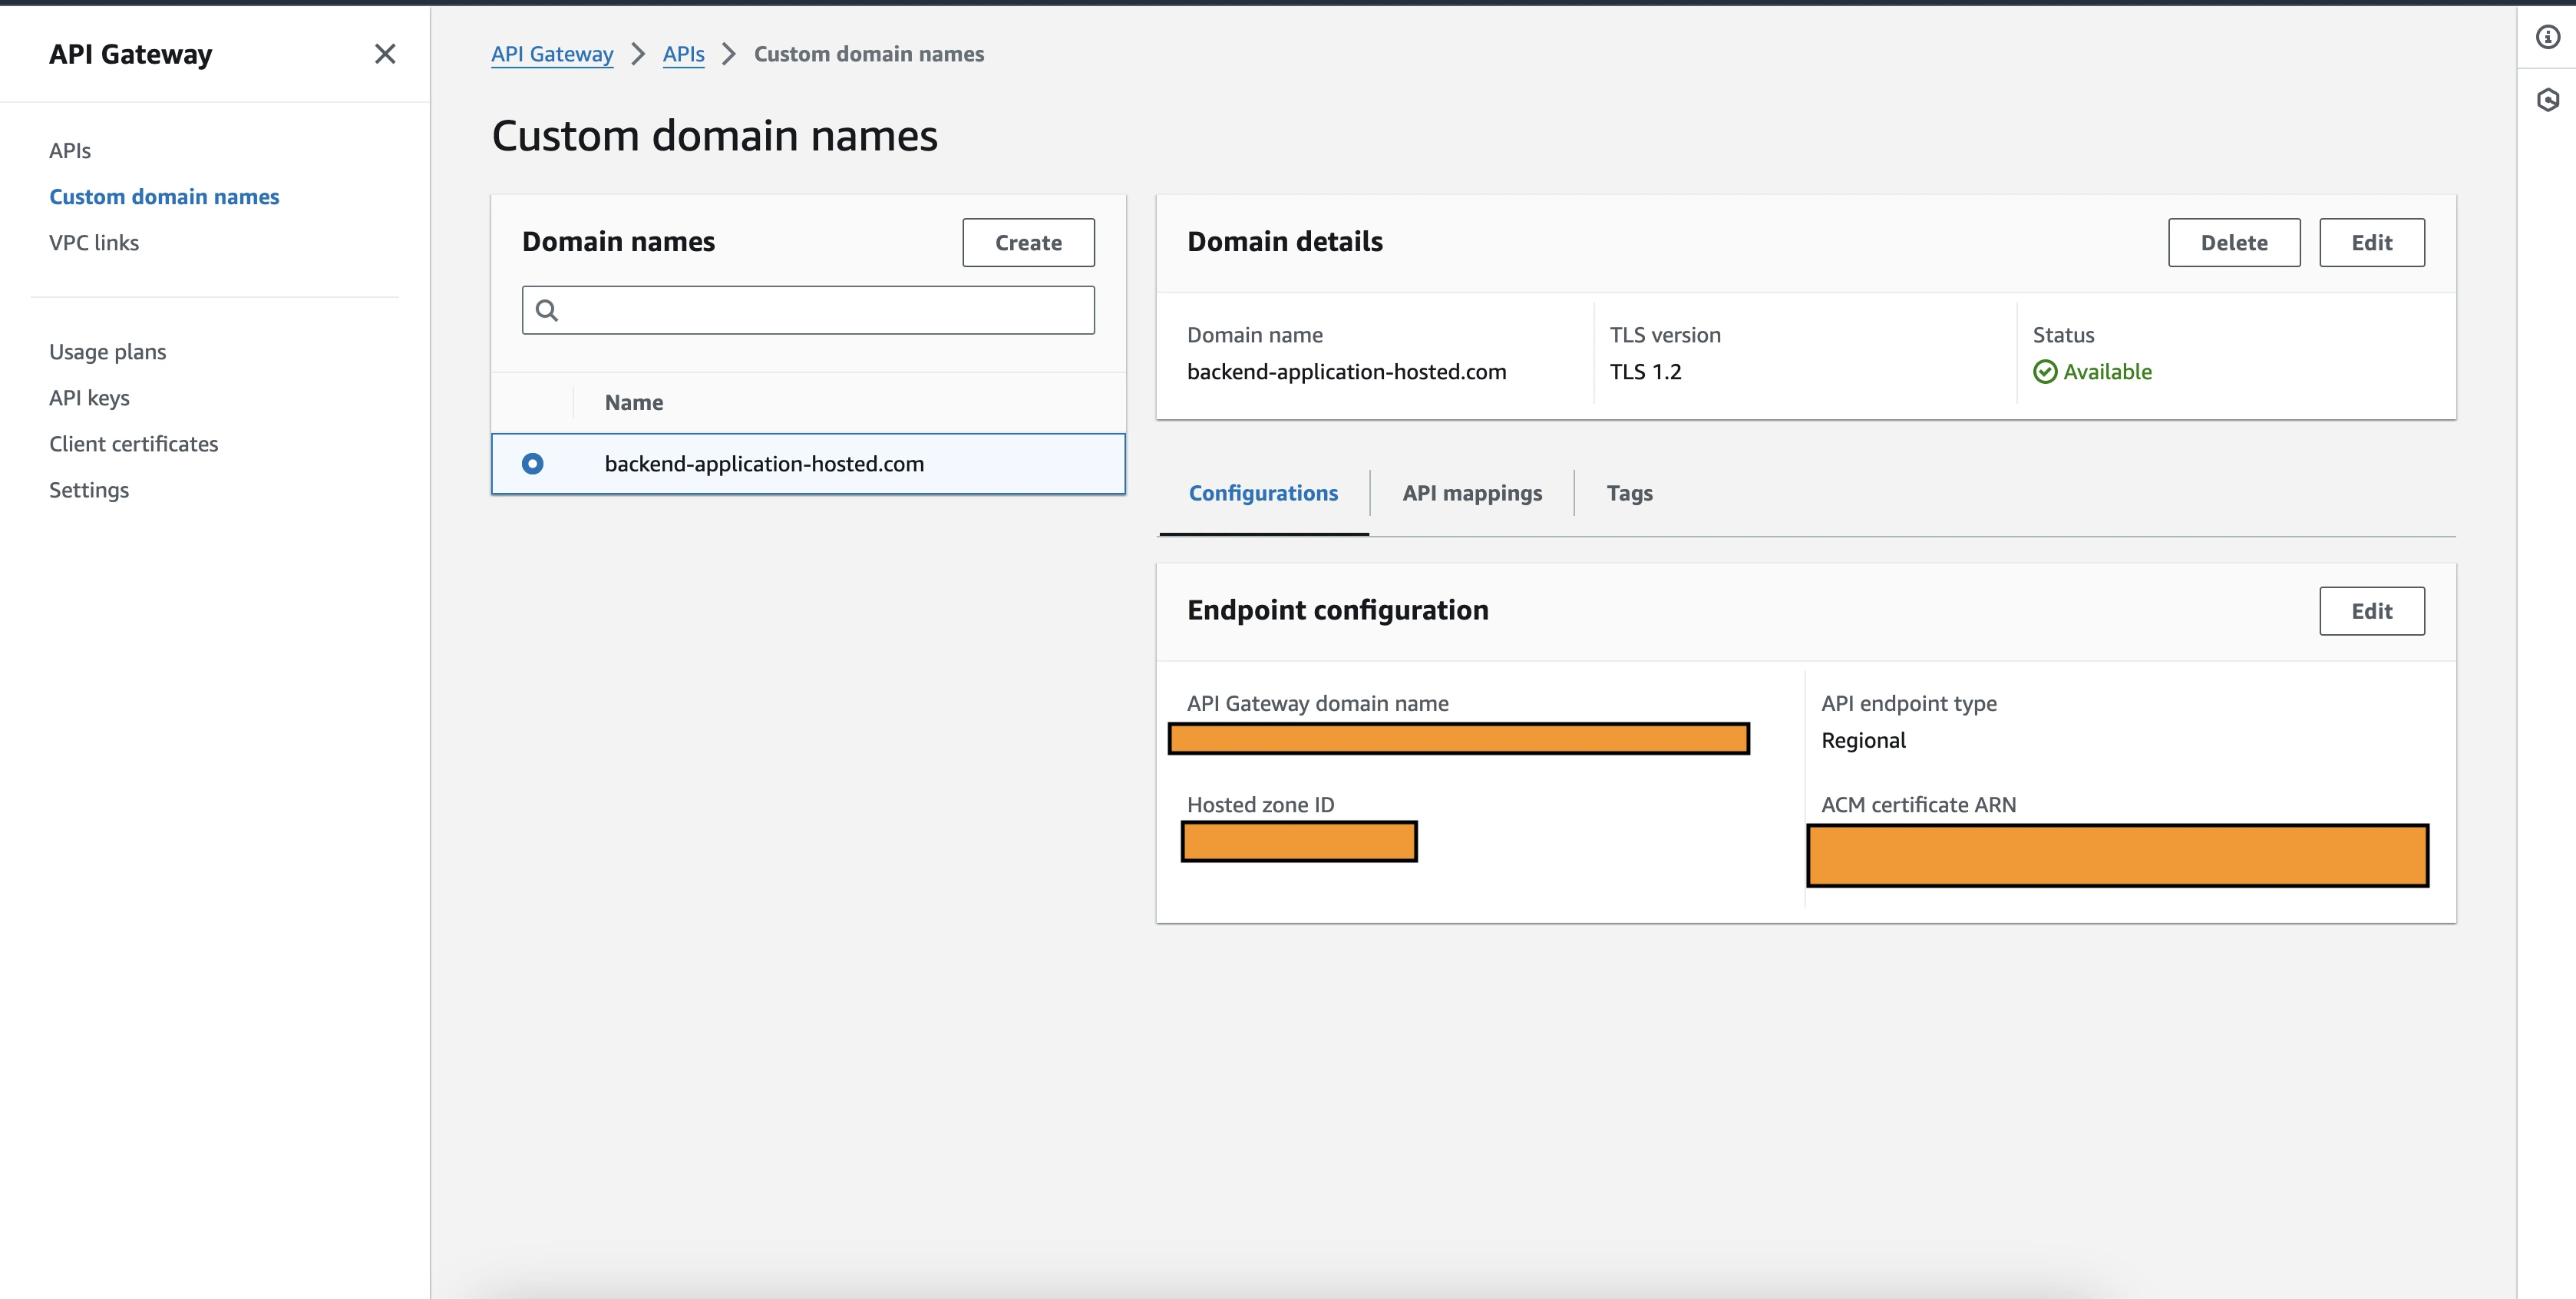
Step 3: Create Custom Domain For API GateWay & Map the API.
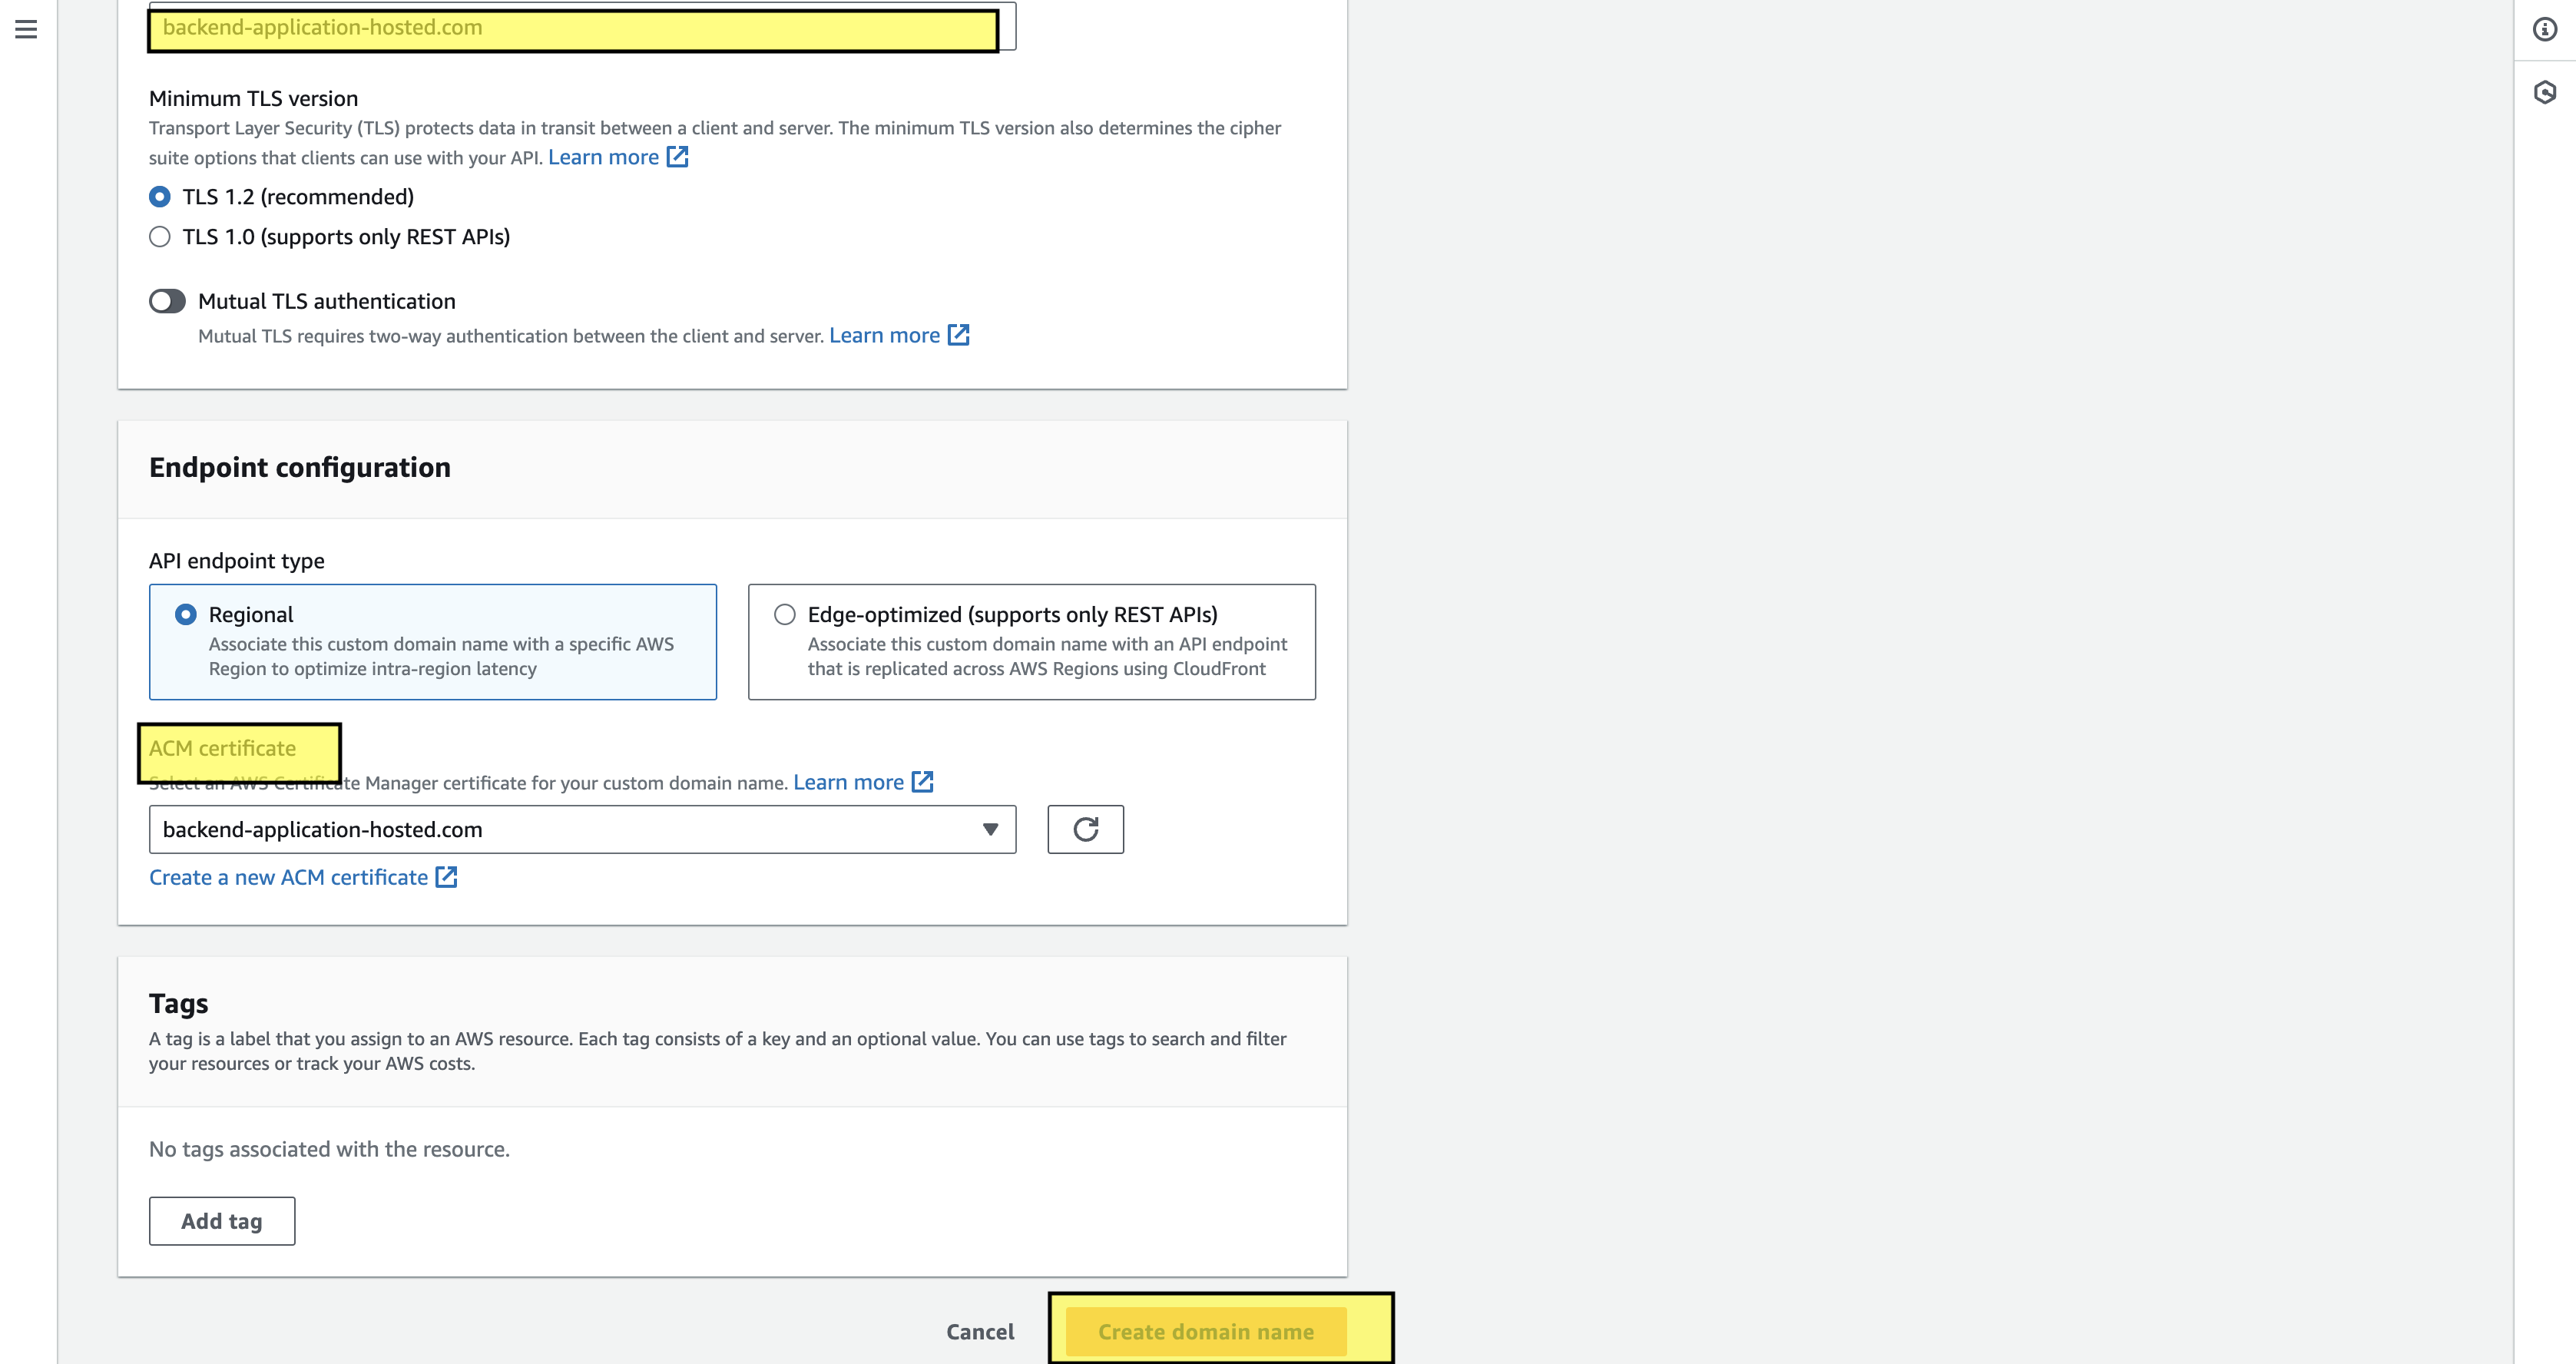
We got the hosted domain with a security certificate attached, and the final part is to map the domain with our created API gateway. We have a deployed API gateway and now it’s time to create a custom domain name. To do that navigate in the API gateway console to the custom domain section, start with the same name as the registered domain name, and attach the ACM certificate that we have created in the prior step. Once everything is done make the custom domain.
Next, go to the hosted zone of route53 where we need to create a record with the Alias, select the API gateway, and enter the custom domain id so that it makes a record which is mapped to the custom domain. By the end, it will look something like below:
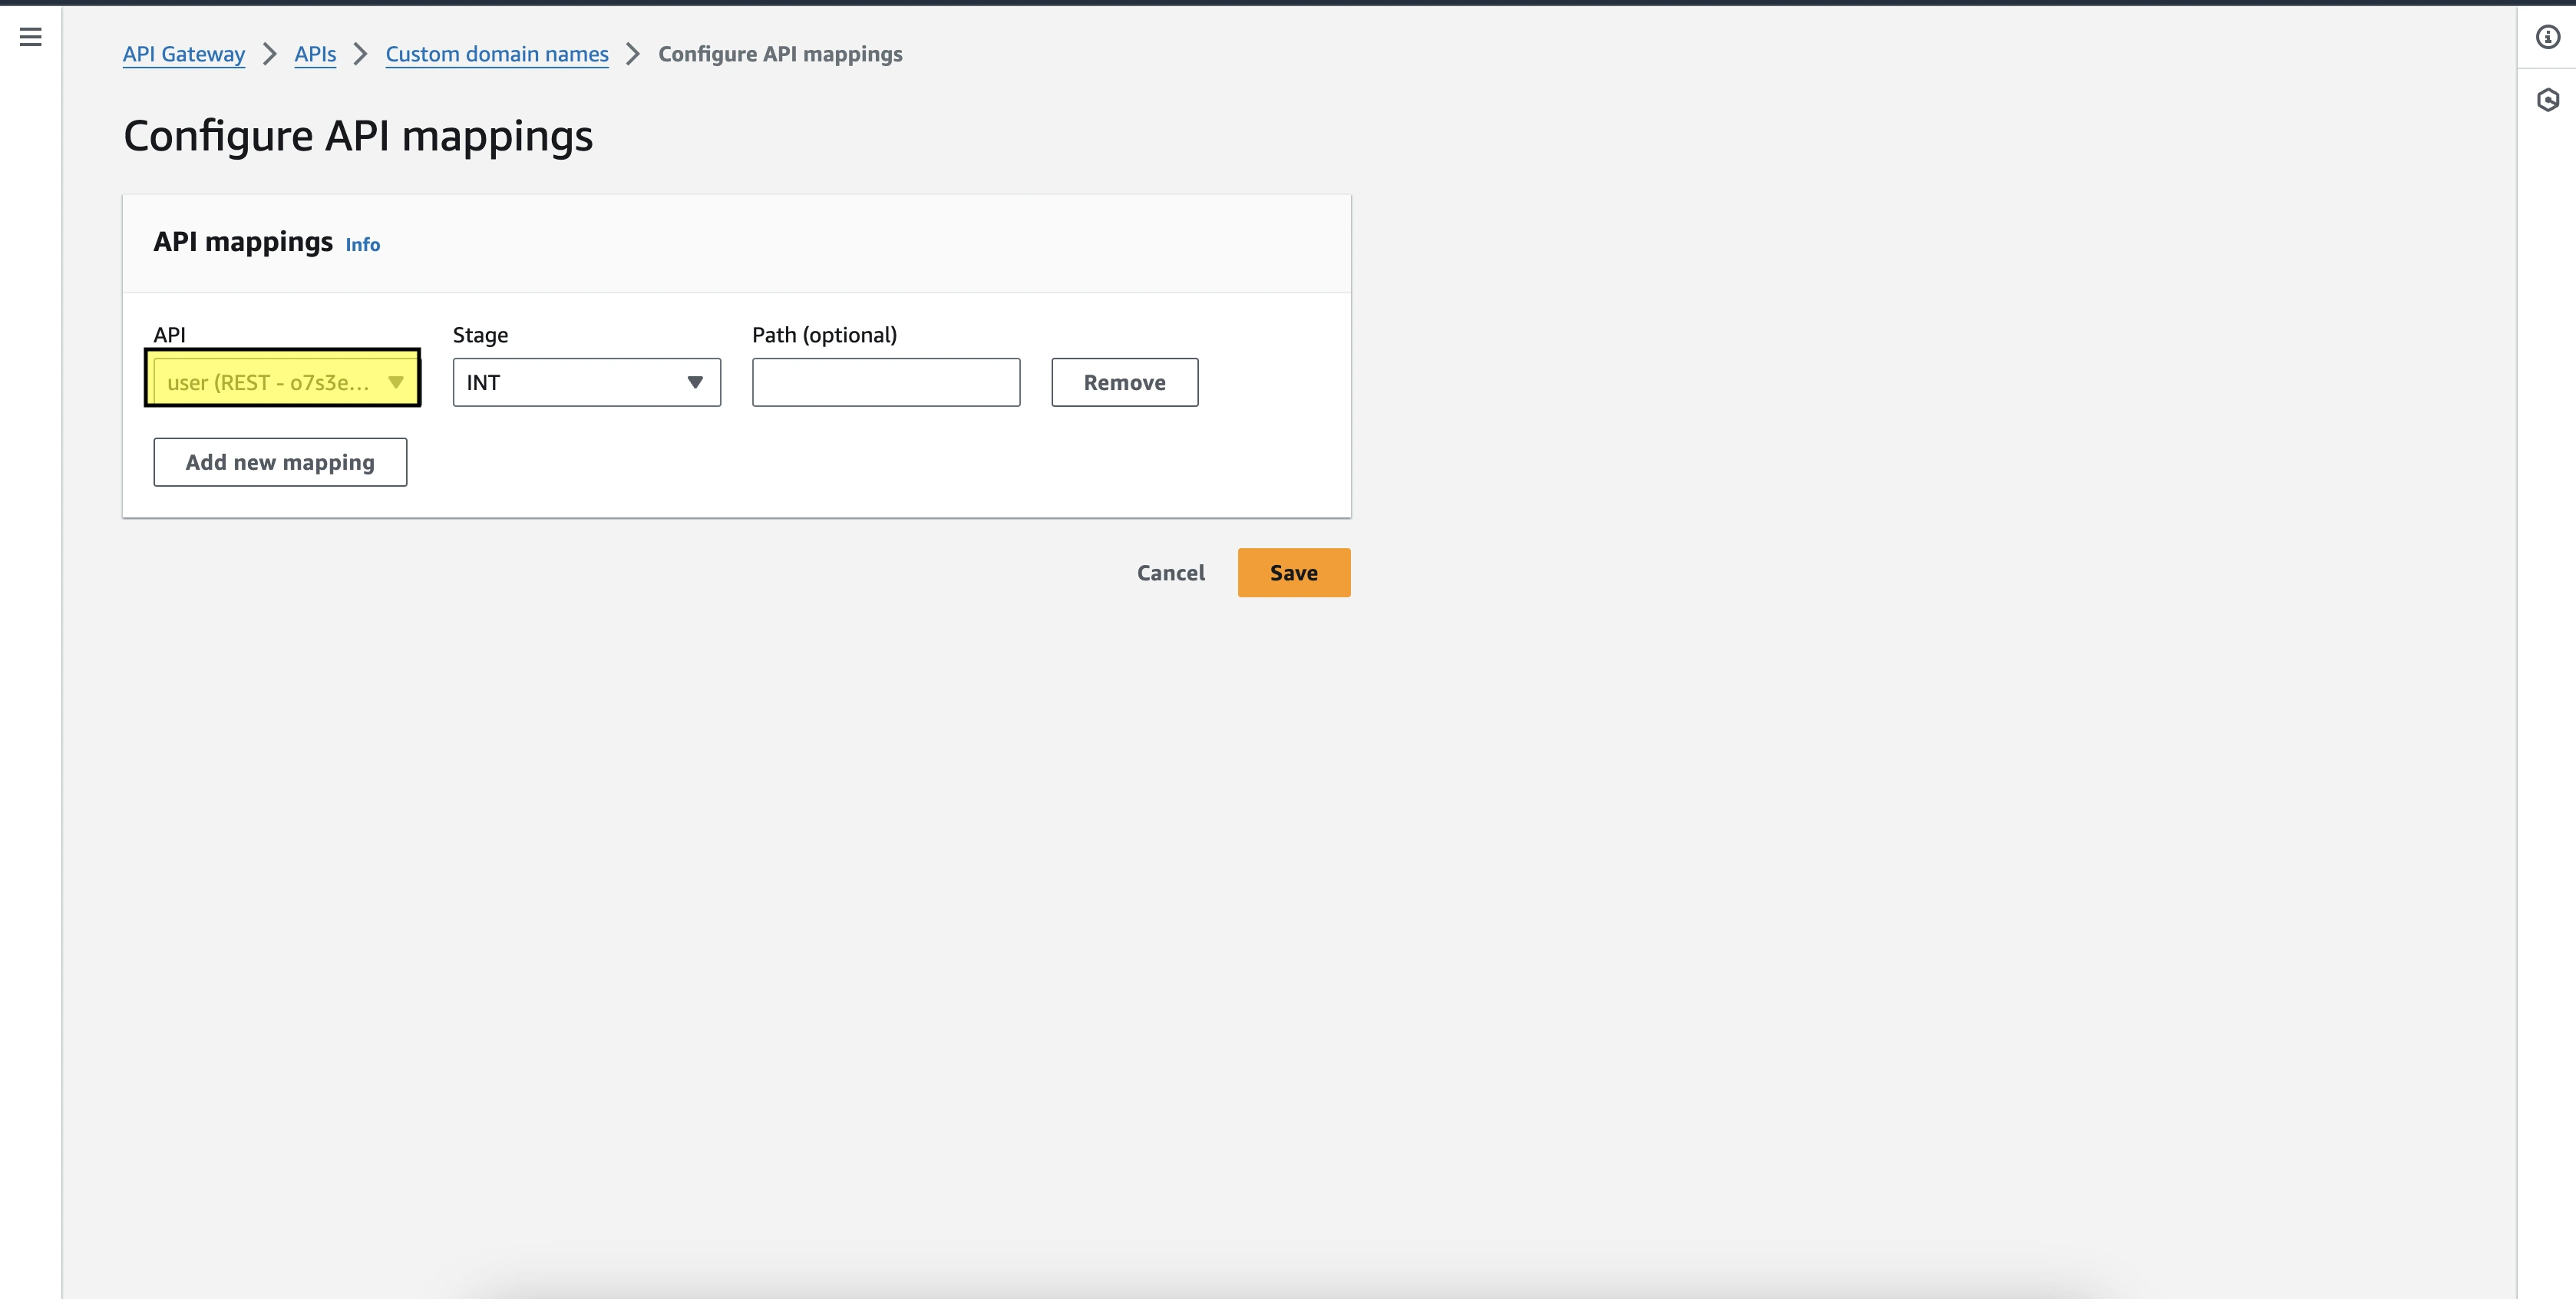
All the connecting links are established successfully now, the only remaining thing is to map the API so that we can use the custom domain endpoint to call the backend application, to do API mapping, navigate to the custom domain section, and select the API mapping tab.
In the API mapping section you will get an option to add your API and what stage you want to divert the traffic. Once all have been selected, click on save, and by this, the process of adding a custom domain to your app comes to an end and now the endpoint is active to use in postman or frontend.
Test In Postman:
Let's do the live testing to verify that the custom domain is working properly to make sure we get the endpoint:
https://backend-application-hosted.comTo do Create, Update, Get & Delete using this base URL, we need to specify the path for different actions.
Create:
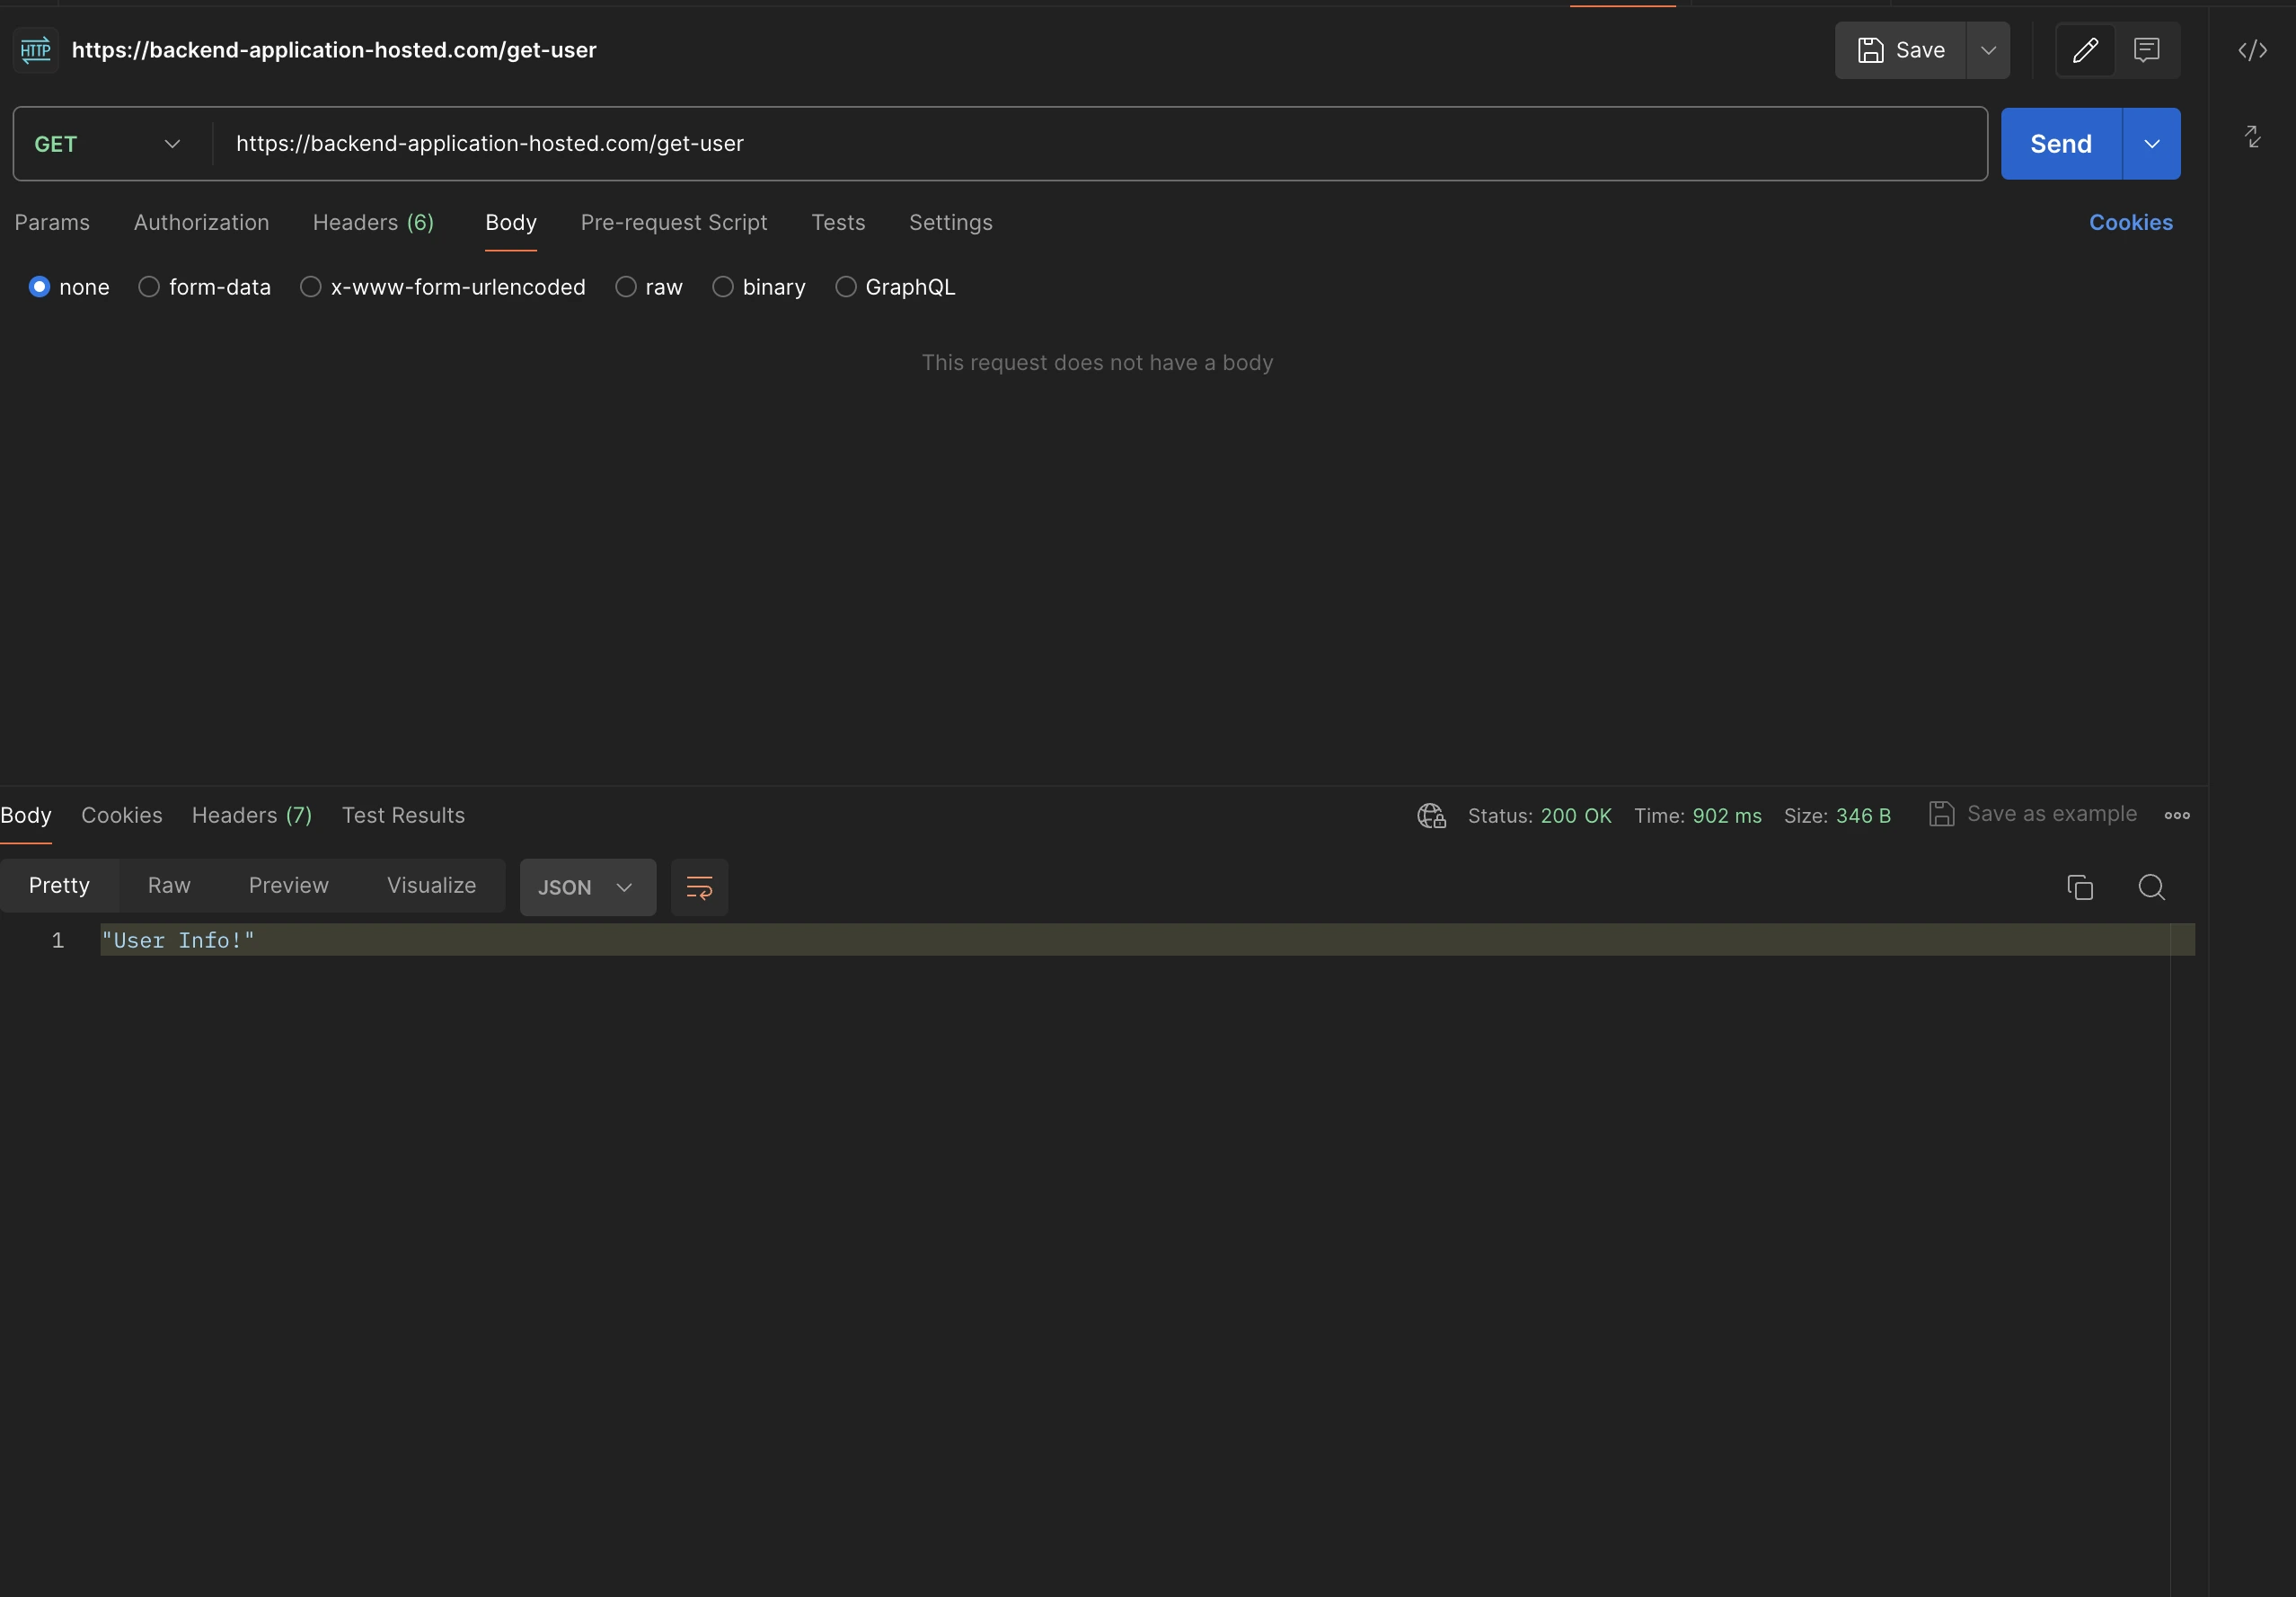
https://backend-application-hosted.com/create-userGet:
https://backend-application-hosted.com/get-userUpdate:
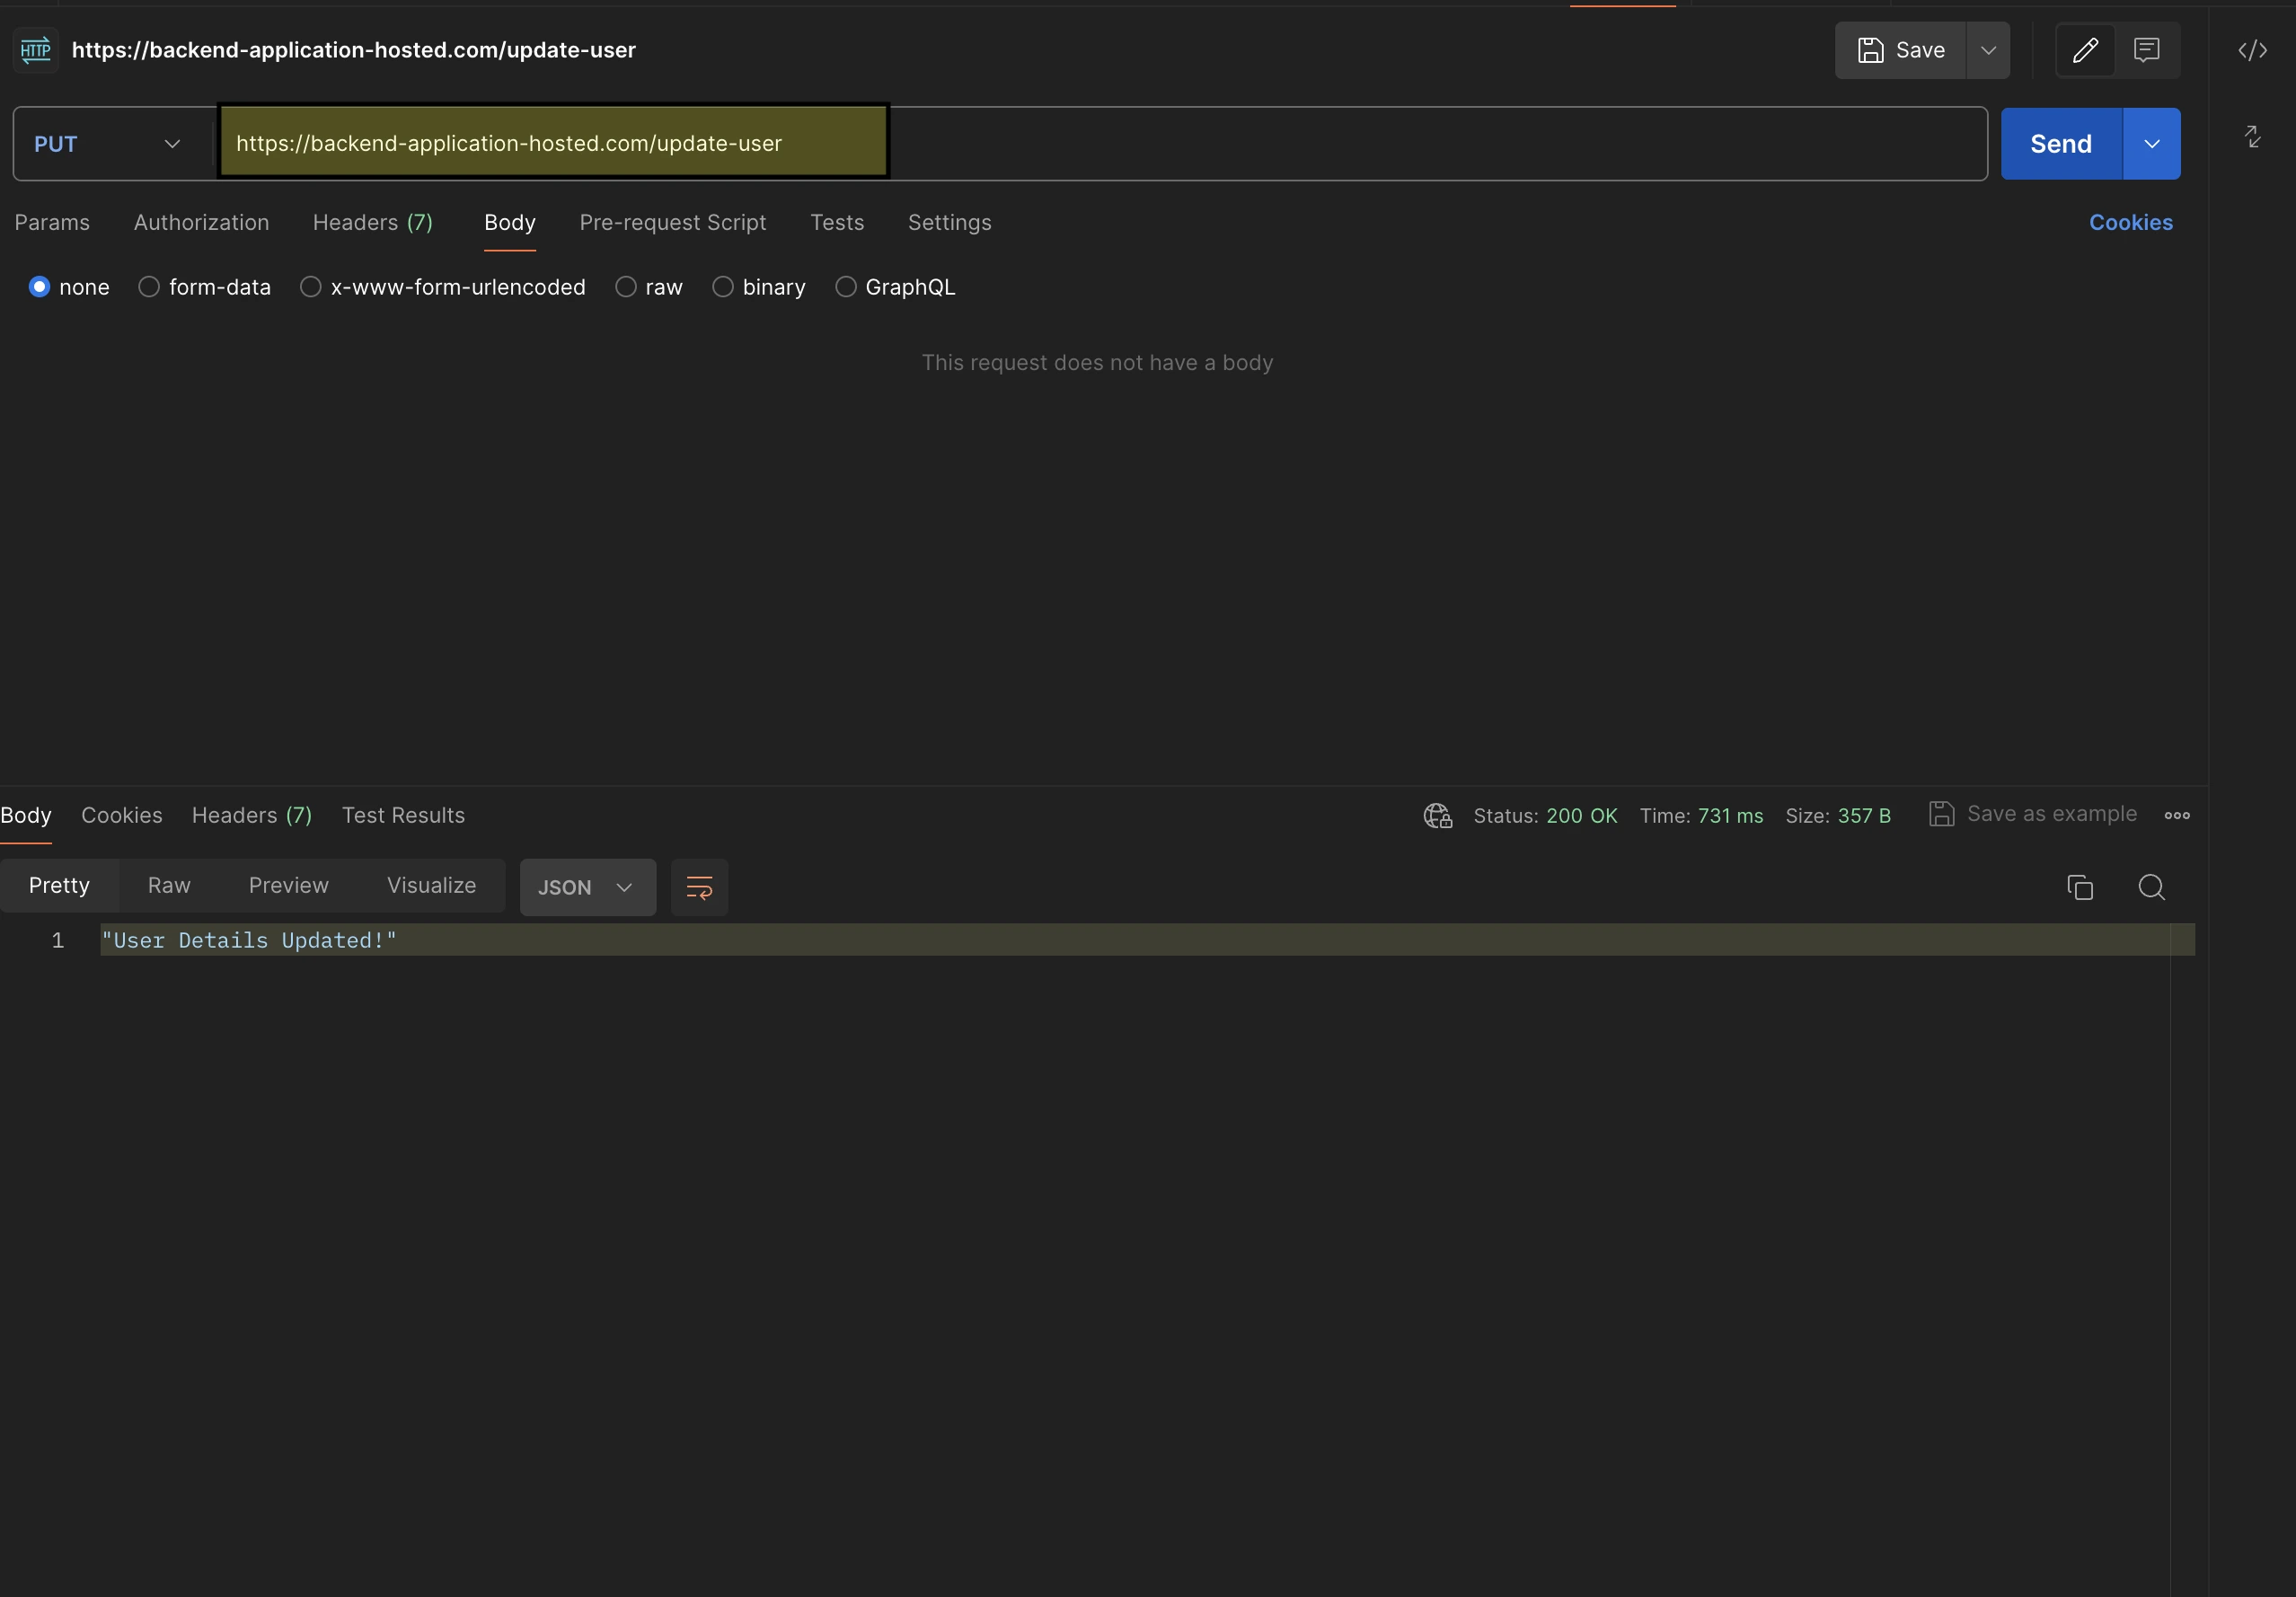
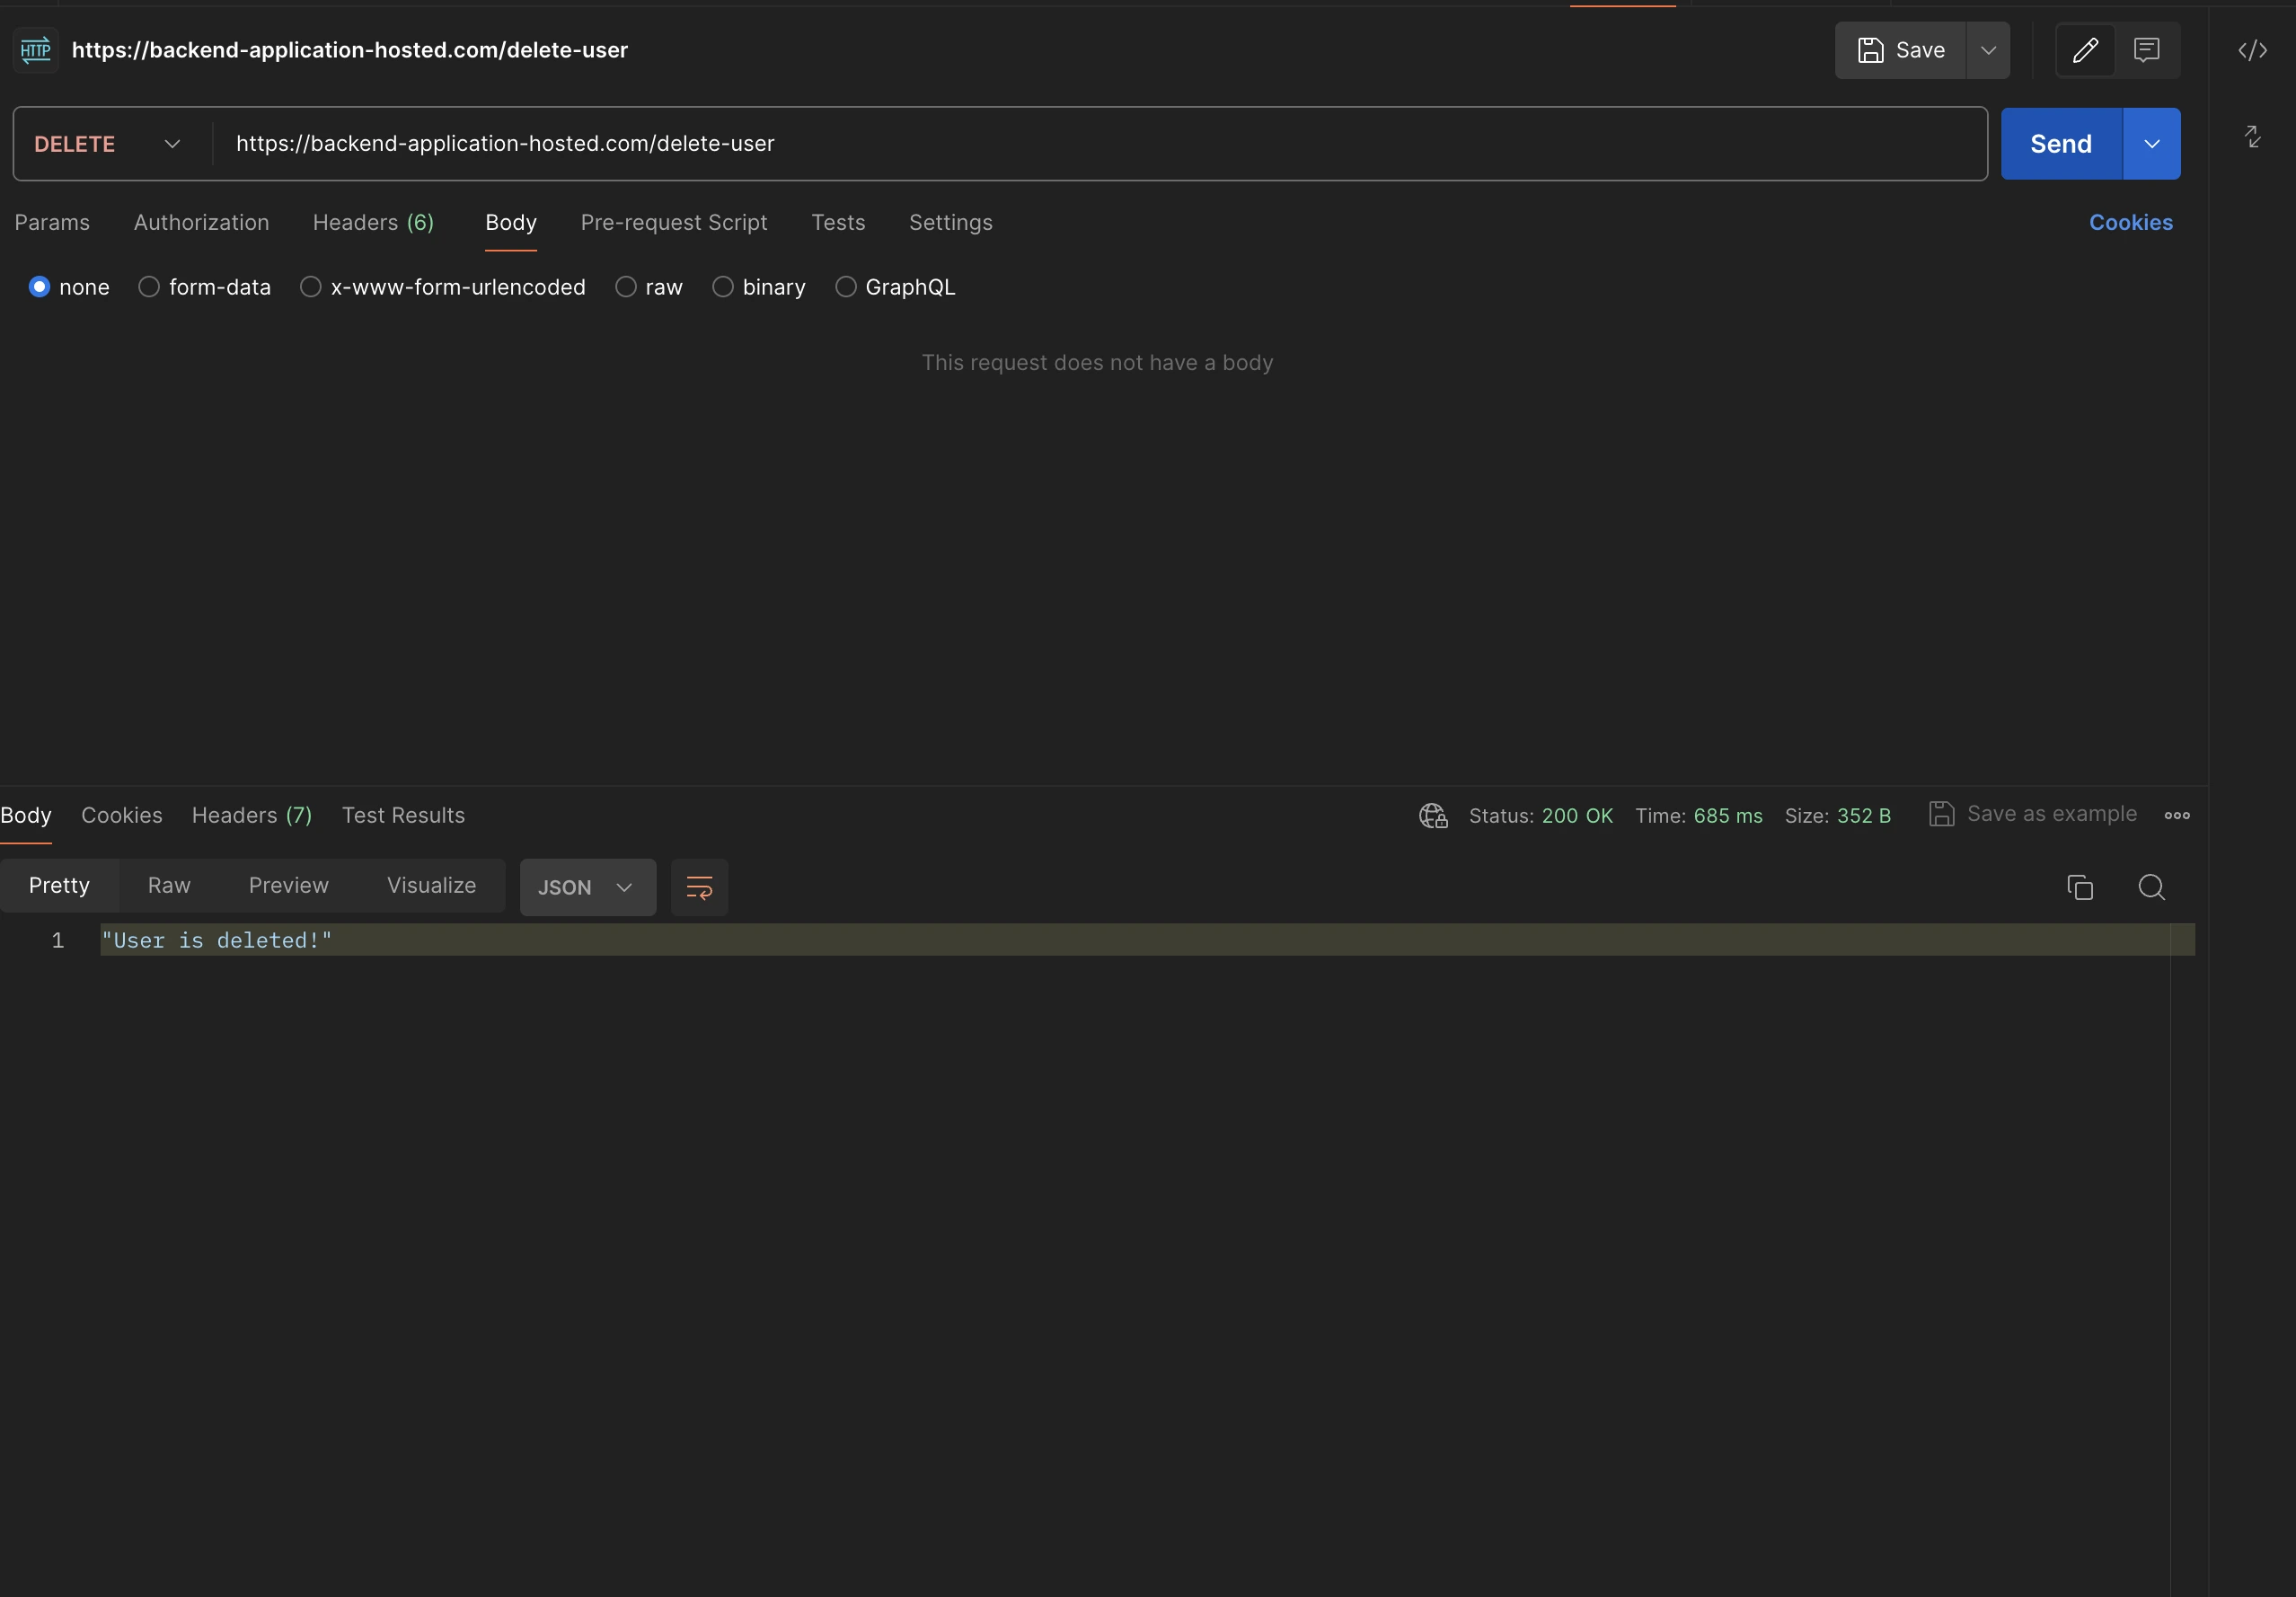
https://backend-application-hosted.com/update-userDelete:
https://backend-application-hosted.com/delete-userAuthorization has been skipped for this endpoint which means this is publicly accessible via anyone. So let's hit the postman to check everything works well, as a response there won’t be user info, instead it will be a message to showcase that the operation is taken care of, with the status code 200.

Conclusion:
So far in this blog, we have witnessed how we can make use of AWS's different services such as Route53, ACM Certificate, and Custom Domain to have an easily remembered endpoint for your backend application. With the help of Route53, we have learned to create a domain by attaching the SSL/TLS certificate as a matter of security, and we can use this to our API gateway to get a custom domain. These steps included will be helpful to get the custom domain for your smaller or bigger projects which will always be crucial to maintain a recognizable domain.
With the help of testing in Postman, it ensures that the steps included for mapping the custom domain are fully functional to use.
Try these steps out, and share your experience or journey in learning something new in the Cloud.
Reference:
- Route53 Domain Registration: hhttps://docs.aws.amazon.com/Route53/latest/DeveloperGuide/registrar.html
- Custom Domain API Gateway: https://docs.aws.amazon.com/apigateway/latest/developerguide/how-to-custom-domains.html
- ACM Certificate: https://docs.aws.amazon.com/acm/latest/userguide/gs-acm-request-public.html


%20(1).svg)

.svg)


.webp)