

This article will show you another option to build and deploy a full-stack serverless application with SSR on AWS Cloud. We will build a stateful web application to manage the kanban boards. The fun part is that we will use only web standards on the frontend, meaning that our app will be built using vanilla JavaScript and HTML.
Why platform matters
To understand why I emphasize web standards, let’s talk about what it looks like to maintain a web application in 2022. If you are a front-end developer who just accepted a job in a company, there is a great chance that you will not work on a new project but on developing an existing or maintaining a legacy app. What makes it really hard is that so many JavaScript frameworks and templating engines are in the wild. Fixing bugs introduced by breaking changes in the next version of your favorite framework or migrating to another framework can sometimes be more painful and hard than developing everything from scratch.
So why do we have frameworks? Implementing web standards in the browsers is happening slowly. Sometimes browser vendors intentionally avoid adding changes to make their platform closed and dependent on their tools. Frameworks went from solving issues to introducing an almost new platform and syntax you need to learn each time you switch from Angular to React or Vue, Svelte… etc. Several years ago, the platform was not ready. There were some missing pieces that polyfills and frameworks were resolving. Today, browsers are more than capable of doing complex tasks.
In the past, one of the things that were a deal breaker for using the platform only was that browsers didn’t have a component model. At least not all of them. Nowadays, you achieve this by using custom elements, HTML templates, and shadow DOM, which, combined together, makes a WebComponent.
It can look odd or harder to utilize it instead of your favorite framework, but if you are using web standards, you can be sure that your application will work in the browser for 5 or 10 years from now because you are using the platform and nothing else. With the frameworks, you cannot be sure that your app will survive a framework upgrade (take AngularJS to Angular transition or, more recently, React 17 to 18, for example).
Last but not least, using the platform directly means there is no extra layer between our code and the browser, affecting performance. Our bundle sizes are smaller, which reduces the startup time.
This is already a long intro and could be even longer, but to make a long story short, If you haven’t already, I strongly recommend researching and learning about WebComponents.
The Application
That being said, let’s see how we can build a serverless application that consists of the following:
- Frontend app with SSR
- Backend API
- State management
- Database backend
- Test offline
- Deploy our full application to staging and production environments
Sounds complicated? You might be surprised. Let’s discuss the tools we will use to build and deploy our application to AWS.
Architect Framework
The Architect is a framework that helps you quickly build and deploy serverless applications to AWS. We can define all our application resources in the project manifest file. What the architect does under the hood is generates a SAM template that is then used to deploy the application.
One of the awesome features you don’t see daily is an option to eject from the framework. Yes, you can stop using the Architect and continue using the generated SAM application without the framework.
Enhance Framework
Enhance is an HTML framework that integrates perfectly with the Architect. Even though you don’t need Architect to deploy the application, it is probably the best way to do it. Enhance will let you develop your application using the Web Standards only, while the Architect will help you deploy your app to AWS.
In the intro, I talked about the performance. Optimizing web application startup time and time-to-interactive is hard, especially when a Single Page Application (SPA) framework is involved. Recently we have seen a lot of efforts to overcome this issue. That's why so many new frameworks are born, but what we can also see is that many of them are returning back to some proven techniques that we stopped using at some point.
What Enhance is doing is the same. It helps us author the server-side rendered simple HTML page, which we can progressively enhance by adding JavaScript to the browser where we need it.
Building the frontend
Let’s start by creating a new Enhance project.
npm create "@enhance" ./tracker -yThis will scaffold a project with the default file structure. The Enhance project structure is straightforward and intuitive. It uses file-based routing, meaning that whatever you have in the pages folder is treated as a route. Pages are just regular HTML, nothing else.
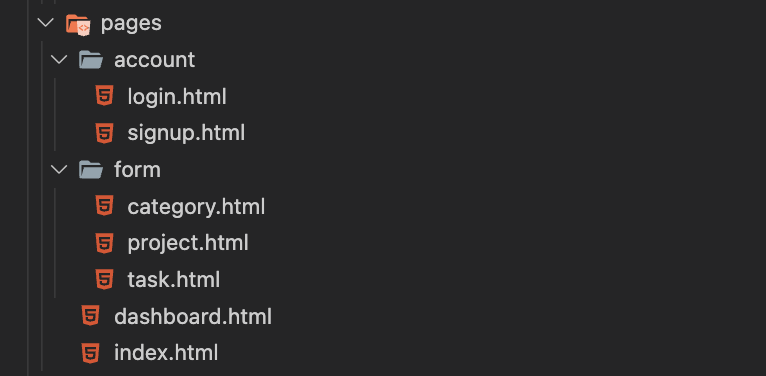
Now that we have our pages/routes defined, we can proceed and create components for our application. To do that, we can create an elements folder. This folder contains single-file components built with ESM modules. These are custom elements in their essence, hence the folder's name.
If you are unfamiliar with the term, custom elements are a set of JavaScript APIs that allow you to define custom elements and their behavior. One rule about naming custom elements is that they must have a dash in the name so they don’t conflict with the native HTML elements (i.e., app-nav, header-component, task-card, etc.).

We can reuse these elements in our application multiple times, wherever we need them. This is how we use the login form element in the login.html page.
Notice the component name. I said earlier that custom elements must have a dash in the name. Enhance will create a custom element name by combining the folder and the file name where the component resides.
We now need two more things to complete our frontend. One is the place to store our static assets, and the other is to manage our application state.
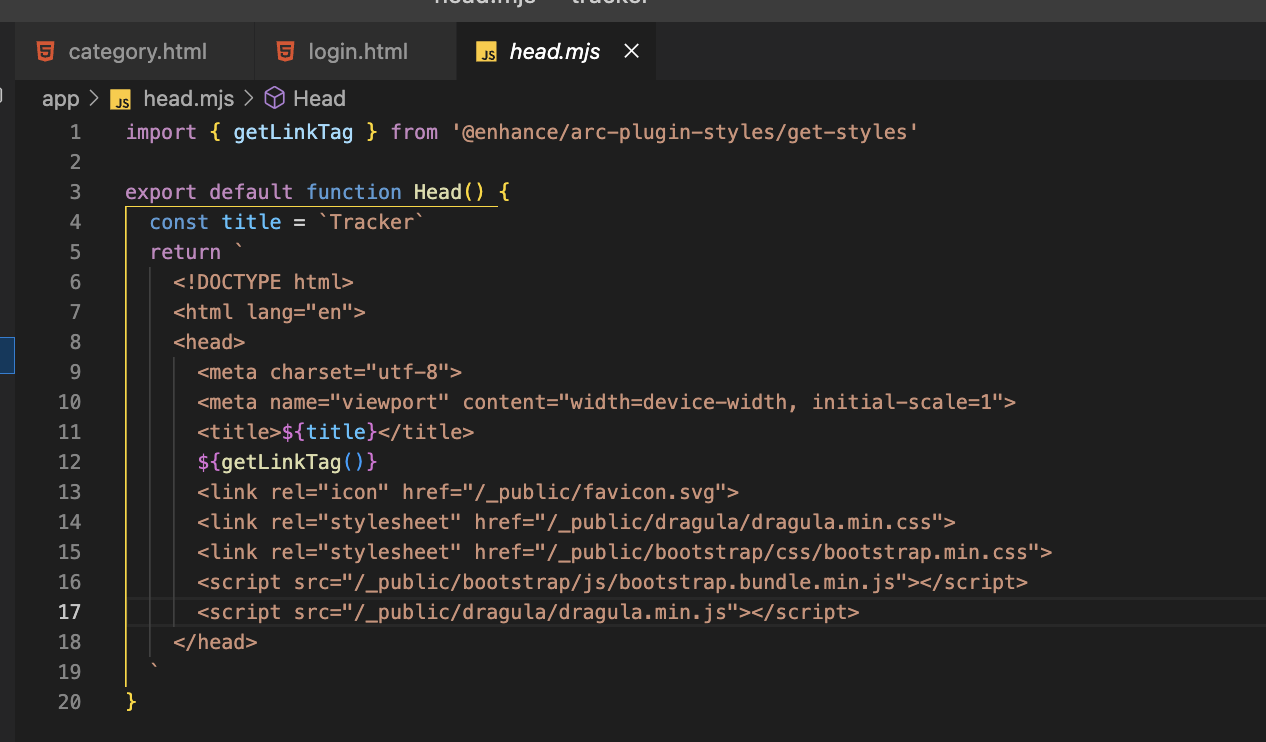
We can store our statics assets in the public folder. The contents of this folder can then be referenced when we need them. For example, bootstrap is imported into our head element from the public folder. These assets will be uploaded to the S3 bucket on deployment.
And finally, we need to manage the state of our application. Before we move and implement the backend, we can mock the data passed to the frontend and then gradually introduce business logic. Here you can use the architect functions library to access Dynamo DB and do whatever magic you need to do on the backend. I added just an example of accessing project data in the `api/dashboard.mjs` module.
Building the backend
While this is probably the best way to write your backend logic for the Enhance application, I want to create API endpoints using the architect framework for this article. These endpoints will be responsible for accessing and supplying data to our app. We will need to define our resources in the manifest file to do this.
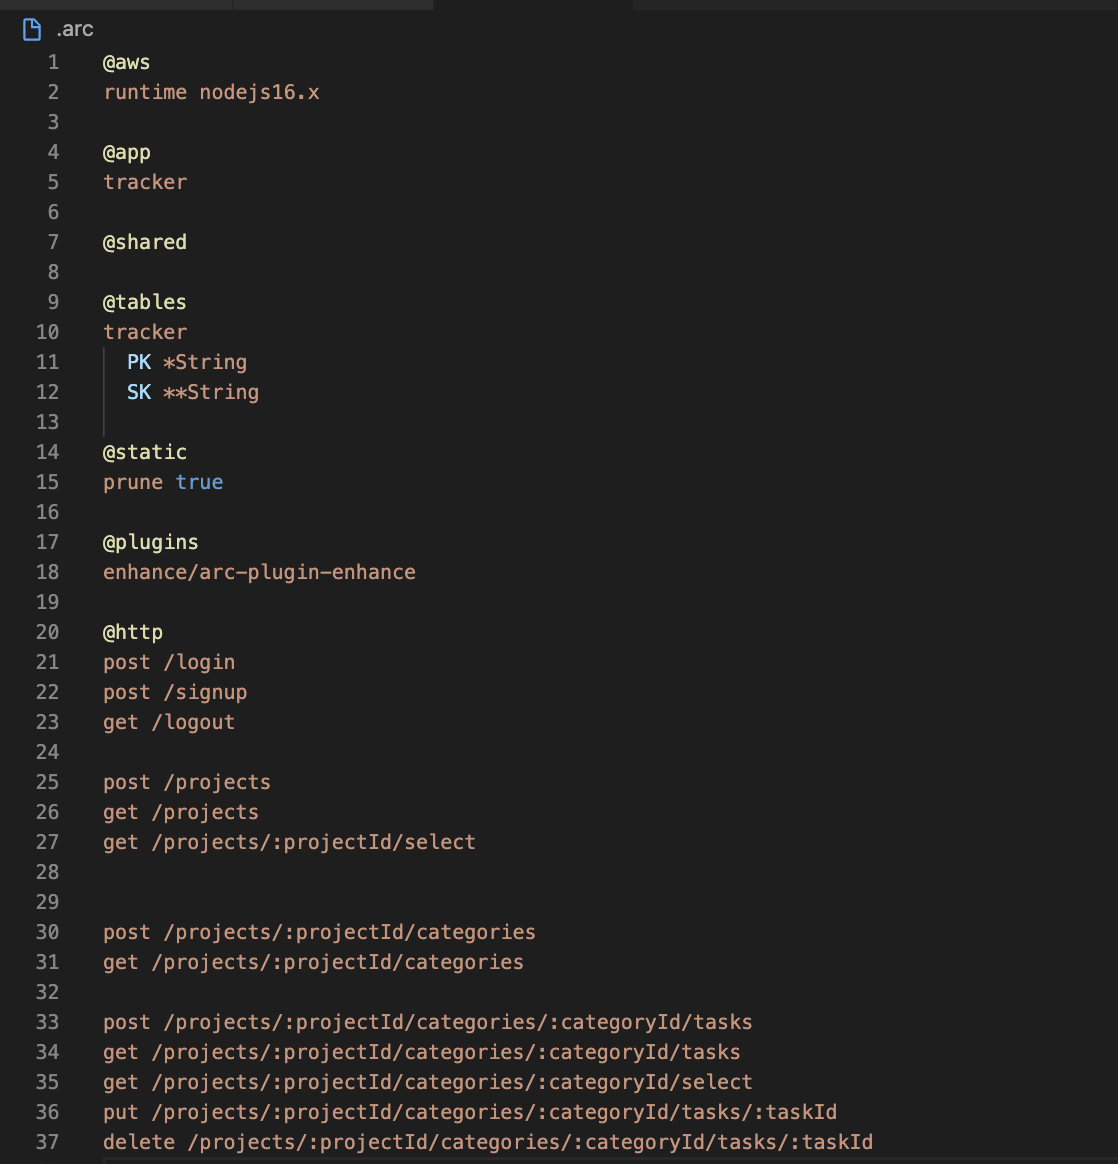
The manifest itself is very easy to read. @tables pragma defines our DynamoDB table with the partition key named PK and the sort key named SK. Another important thing is the @http pragma which defines our endpoints. That’s all we need to start writing the code. By default, the source code for our endpoints is located under the src folder.
Just like on the frontend, code can be shared on the backend. Whatever we put into the shared folder will be deployed to our Lambda functions.
Testing offline
Now we are ready to test our application. We don’t need to deploy just yet. All we need to do is to run `npm start` in our terminal. The application will be served from http://localhost:3333 by default. If we make any changes to the application code, the web server will auto-reload, and our changes will be reflected in the browser.
Deploy
Working offline on our local machine gives us a great developer experience. However, to ensure our application is working in the cloud, the recommended way to test our application is to deploy it. The best practices (and common sense) tell us that we don’t want to test our application in production, meaning we need to have some staging environment in the cloud. With Architect, this is very easy. All we need to do is to run
arc deployThis will deploy frontend and the backend to the staging environment.
When we are ready, we can deploy our app to production
arc deploy --production
Conclusion
Using the platform might look challenging, but once you learn HTML and JavaScript in a proper way, you will enjoy it.
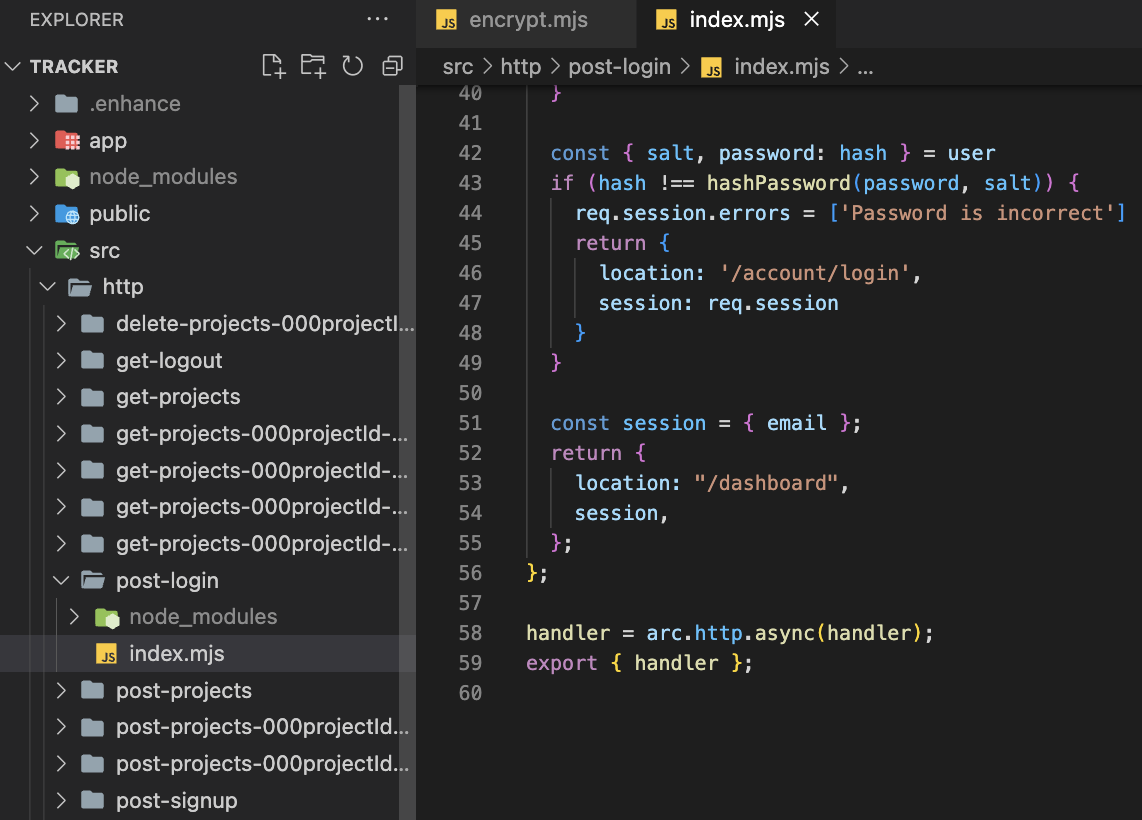
A couple of things from the source code that is worth mentioning is the state management. Pay attention to what Lambda functions return in the response and how sign-up and login forms handle errors. There is a lot to learn from there.
If you want to find out more, please look at the documentation of both projects and, more than anything, try and build something on your own. That’s the by far best way to learn.
You can try the app offline on your local machine or try the working Demo here. The full source code is available on the GitHub repository. For a quick start, check the README.md.
Please note that you can use any fake email address you like. The application will not send or use that email for anything except authentication. The authentication system is there to demonstrate state management.


%20(1).svg)

.svg)


.webp)